Eden – Wet Plate Nude, Series #1

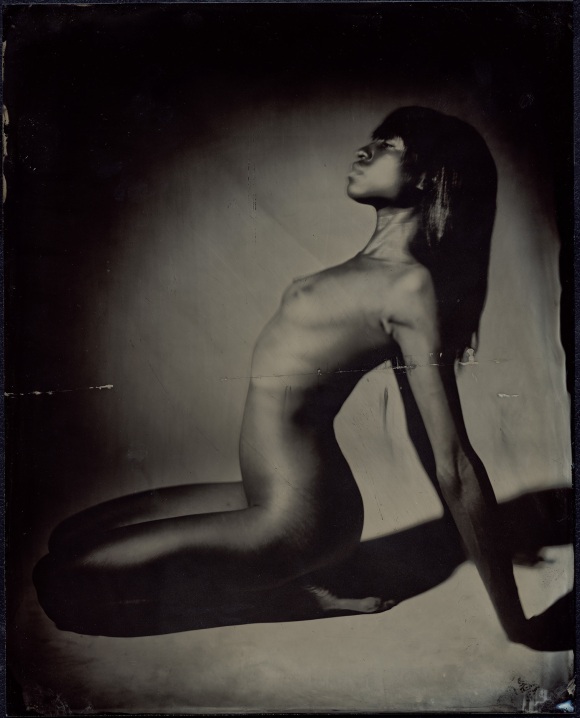
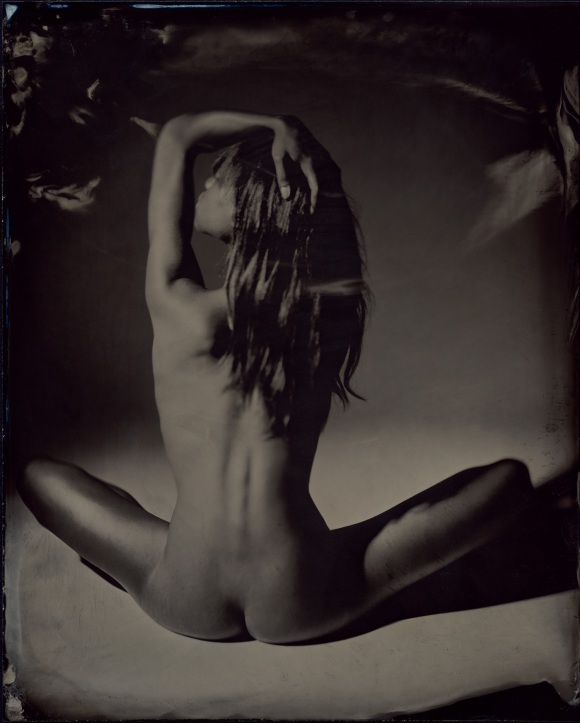
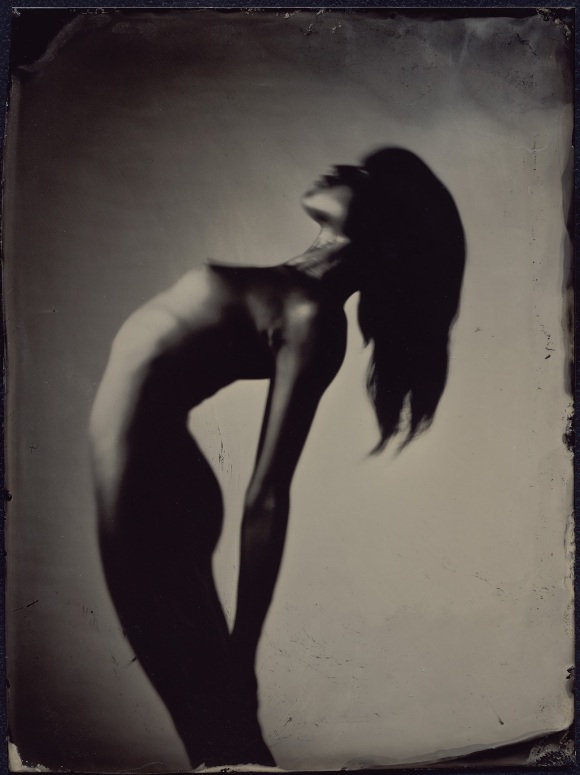
Now that I’ve got all the necessary materials, I can finally green light this project.  I’m going to do a series of nudes on glass negatives and various metals, tin and aluminum.  I’m really enjoying the process, but it’s very strange ending up with only a few plates from each shoot.  The setup + taking each shot is around 30 minutes / plate.  In the first plate, below, we shot it three times to try to get it right.  There goes an hour and a half. 🙂   We shot 6 plates and I ended up with these three that I liked the best.  It certainly makes you take your time before you take the shot.   Here is the lovely, Eden…

Eden I:  In this first shot, I was trying to get it a little sharper, but after 3 attempts, it was just too hard of a position to hold for 10 seconds.  I used a 2k hot light here, which is usually a lot of light for normal film or digital cameras.  In wet plate, which is around 1 ISO, you need a lot of light to record an image.  The shot grows on me the more I look at it though.  I think a lot of these images are going to have a different feel to them due to the process, and it’s one of the things that I’m really enjoying about it.

Eden II

Eden III:  I’m not quite sure what caused the white areas in the top left and right, but they’re in the image.  It can’t be wiped off.  My silver nitrate is new, so I’ve heard of such things happening with that…more mysteries in wet plate land. 🙂

That’s all for now.  Look out for the next one soon…

James

Tagged , , , , , , , , , ,

Rediscovering the Magic of Photography

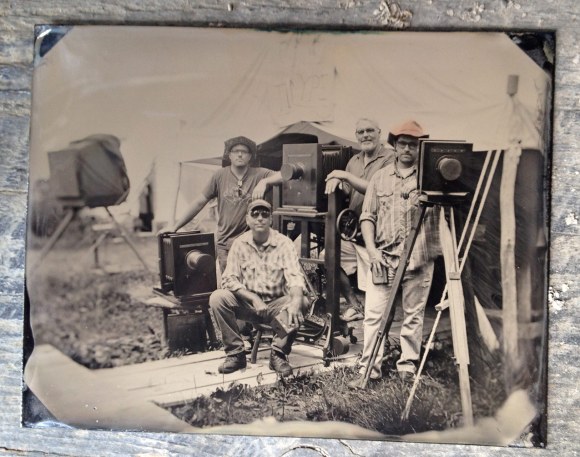
[The group of us at John Coffer’s Farm studying Wet Plate Photography.  I’m on the left in the back…]

I’ve been a professional photographer for around 18 years now.  In that time, I dedicated 6 wonderful years in the U.S. Navy as a photographer.  This is truly where I fell in love with photography as a process and an art.  Back then, it was all film.  Black & white, color, darkrooms, chemicals..it was crusty and dirty, but it was fun!   🙂  The processes were harder to do, but really satisfying when it was done right.  When I was in the darkroom and I saw the image coming up from a print in the developer, it really was magical.

Well, time has marched on and things have gotten simpler and more accessible to the masses.  Digital has come of age and photography has become…truly…easy.  Now, I’m not saying anything about anyone’s talent, or eye, or anything related to their photography being good or bad, I’m just talking about the process.

We’ve come a long way, but there is something to be said for taking the long road, or the road less travelled.  Taking your time and doing things by hand.  I was in search of just such a thing when I visited the farm of John Coffer to learn from him the skills and techniques needed to shoot Wet Plate successfully.

Instagram has proven to society that what it wants is what we once had…what once was.  Borders on images, light leaks, scratches on film, different color temperatures, square formats, polaroids…all of it.  We, as a society, are eating it up.  What we are trying to get is what we once had, but easier, simpler, NOW.   We are living in the very spoiled age of instant gratification.  Anything we want is at our fingertips, to a point that if something takes too much time, it gets discarded and a faster, easier route is looked for.

I found out about wet plate photography and was completely enamored with it.

It’s name, Wet Plate Photography, comes from the fact that you have to put a wet chemical, collodion, on a surface(glass, tin, aluminum).  Then, you have around 10 minutes to shoot and develop that plate(time depends on the heat/environment) before it dries up.  After it dries up, you don’t get an image.  So it’s challenging in the field, but very do-able.  The final result is so unlike any other form of photography.  It’s beautiful.

Each glass negative, ambrotype, or Tintype made takes around 30 minutes or more to make from start to finish.  It slows you down and makes you think about what you’re shooting.

My trip to John Coffer’s farm in the woods was born out of a desire to get back some of the simple joy it is to see the image come up again in front of me, get my hands dirty, and create something from nothing.   I didn’t realize I missed it until I started buying polaroid and film again.  The analog nature of it was giving me something that digital just didn’t.  I didn’t want it, “simple”, anymore.  I wanted to put the magic back into photography.

So what this post covers is my journey to John’s farm and some of the experiences and photos taken during my time taking his class.  What I can say unequivocally  is that is was a profoundly eye opening experience and one that I would like to share.

This is just the first step, the first experience, in what will be an ongoing exploration of this early art of photography.

It all started with a long drive, just me and Delilah(My Zipcar)   😉
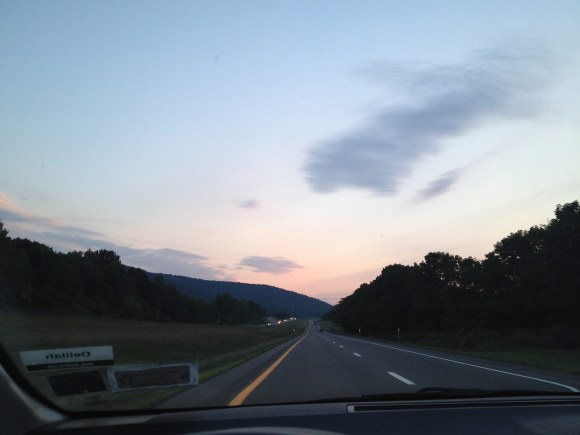
Definitely one of the things I miss living in the city…trees, mountains, fresh air, wide open expanses.

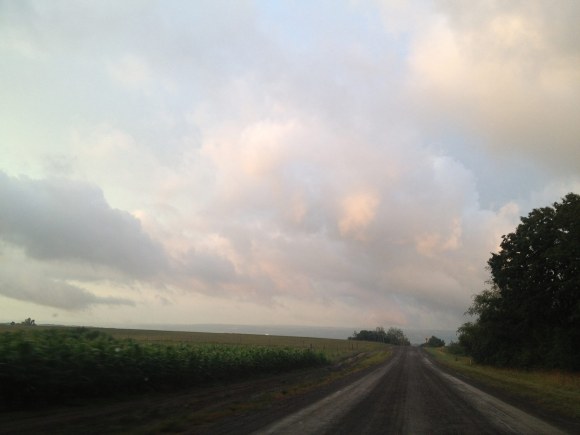
At the lodge now…loving the sky.

I‘m off to Coffer’s now.  You know you’re getting close when you hit the dirt roads.  He’s a little bit off the beaten path.
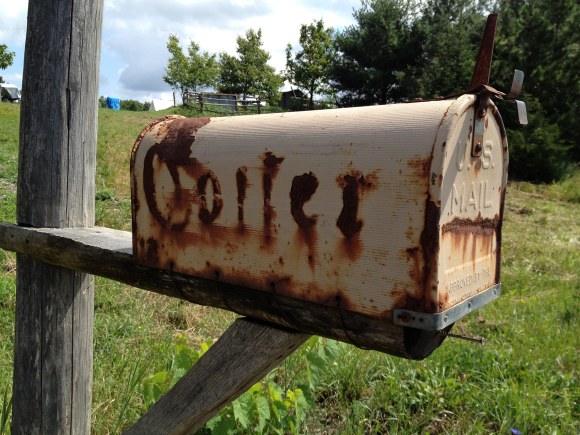
We have arrived.  This is also John’s only form of communication.  He doesn’t have a phone and he’s proud of it.  U.S. Mail all the way… 😉
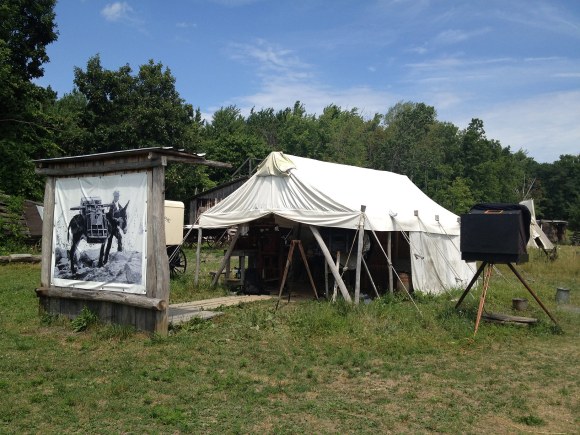
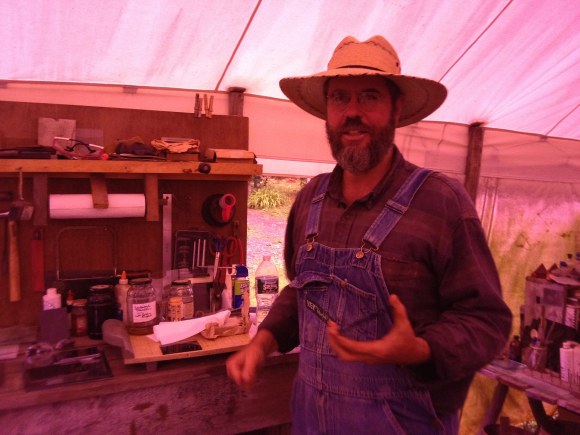
So This is where it all happens.  The tent in the middle has a darkroom, a sink, and is filled with all kinds of historical cameras, lenses, and old tintypes.  This is where he did most of the teaching, although we shot all over the farm.
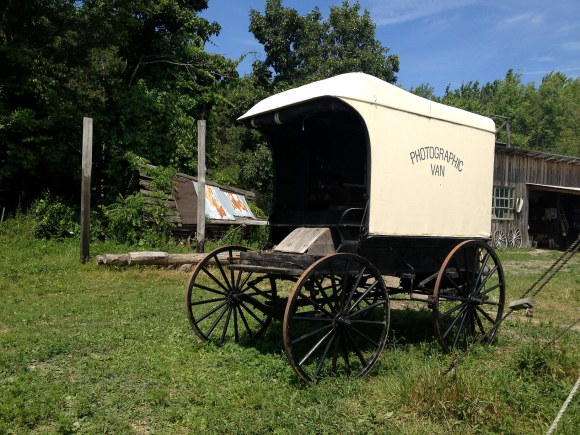
This is what John rode around in for 11 years pulled by Oxen at 2 miles an hour.  He was recreating the life of a 19th century photographer.  It’s got a full darkroom inside.  If this thing could talk…
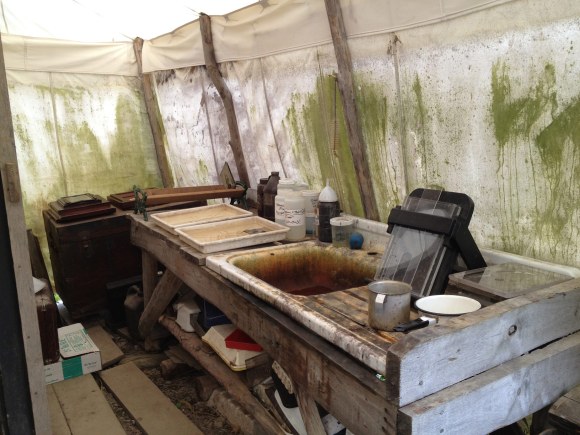
The deep sink for washing and fixing the plates.
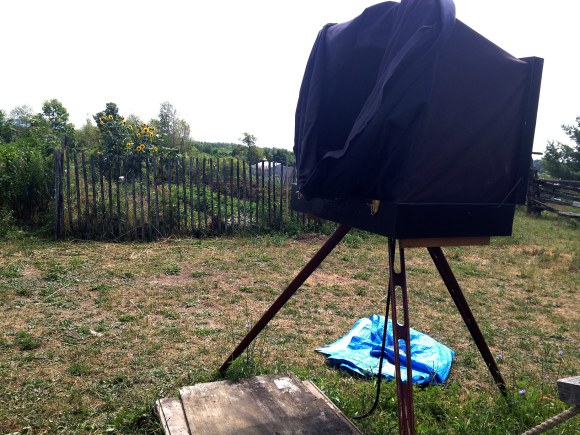
This is called a, “Dark Box” and is what you use in the field to develop your plates.  It’s basically a portable darkroom.  I need to build one that can fit in the back of an SUV so I can take this show on the road. 🙂
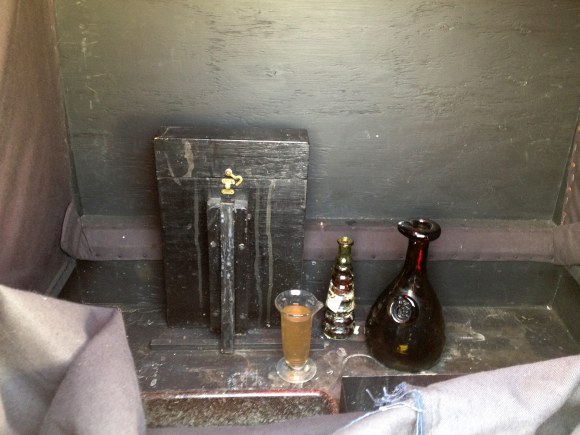
These are all the chemicals you need to do wet plate.  On the left, in the box is your Silver Nitrate bath.  The yellow liquid is your developer, then the little bottle is Collodion, and lastly, a jug of water to pour on your print to stop developement.

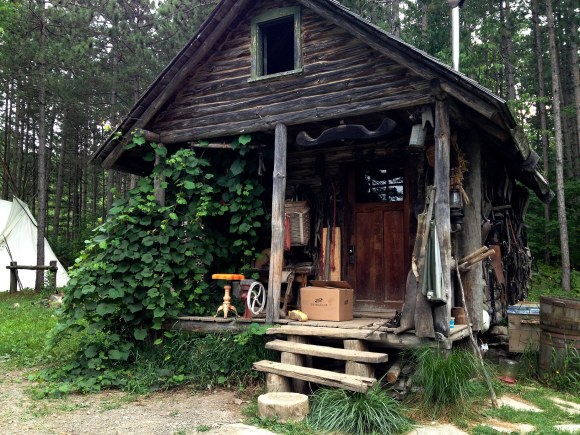
Here’s a few shots of John’s home and some shots of the farm…

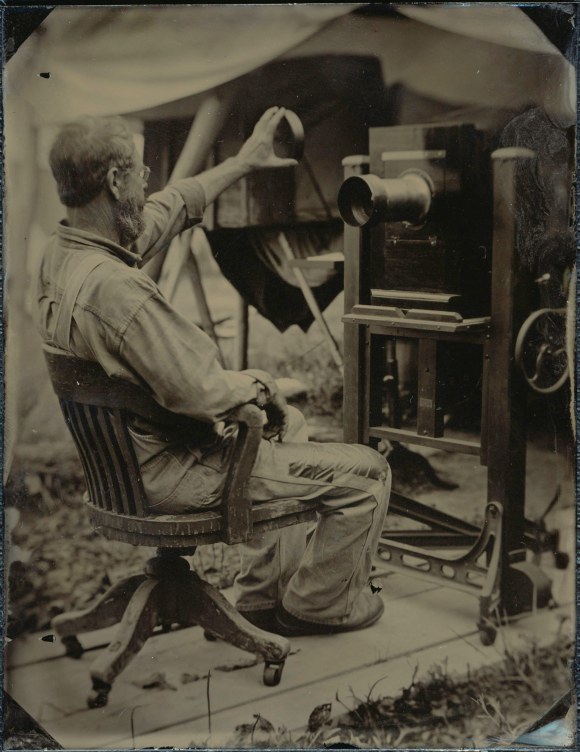
This is John fixing the plate he shot of the class.
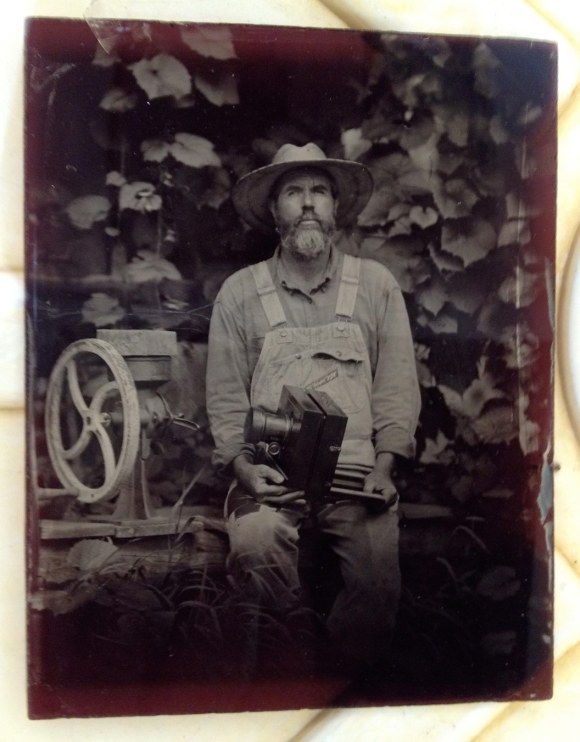
This is the first portrait I did of John.   It’s also my first plate.  We started out small as it’s easier to get a handle on how to put the collodion on the plate that way.  It’s a 4×5 tintype.  You can click any of the images in this post to see them bigger.

This is me fixing the second plate I did of John.  It was shot on Ruby Glass.
This is the image in the above video that I shot of John.  The Ruby Glass prior to me shooting it(below).
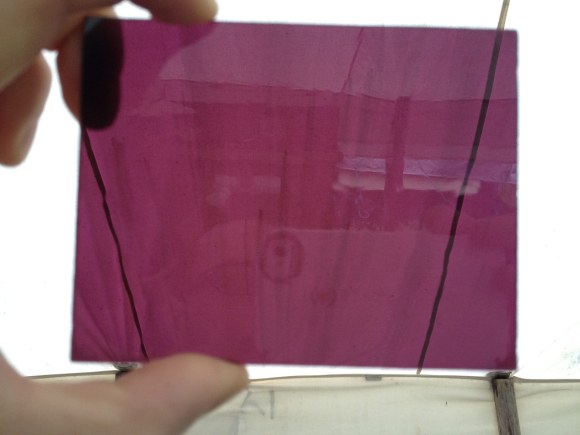
John, shot through the ruby glass filter…teaching away.

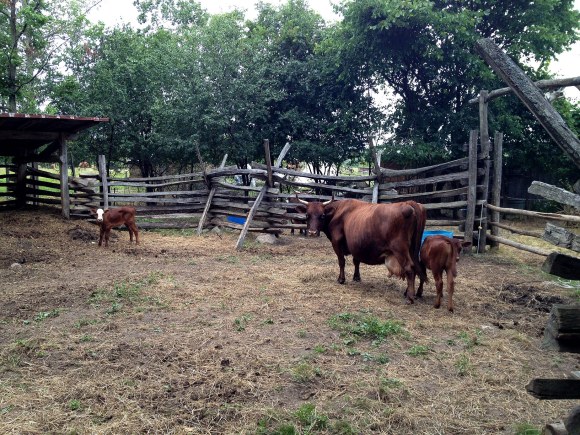
In general, the farm is awesome.  As I live in New York City, I need my nature fix to get me balanced.  He’s got many animals on the farm.  Horses, a donkey, cows, bulls, a cat or two…and lots of chickens.  I have come to appreciate how cool chickens are during my time at John’s.  They will just randomly follow you  around the farm.  They’ve just got one thing on their mind…food.

I found out they like Doritos, donuts, pretty much anything that we consider food, they’re good with.

With that in mind, for one of my plates, I decided to dedicate one to, “The Chicken Whisperer”.  See below.  The chicken actually stood pretty still for this…lol.
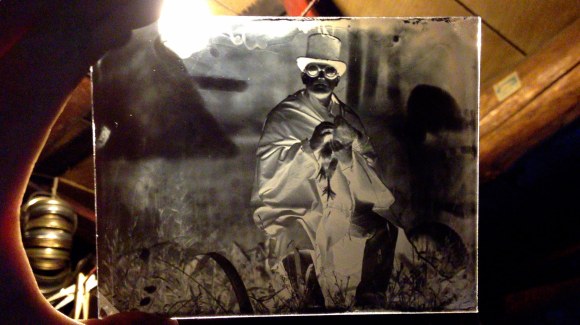
This is the glass plate negative(clear glass) that I shot and the albumen print  made from that glass plate(below).
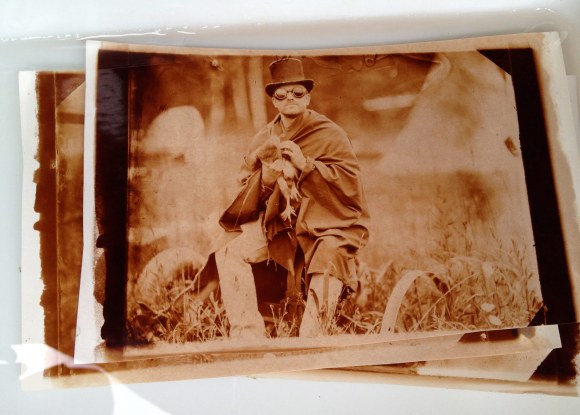
Below is the albumen print, “cooking” in the sun.  Very cool process to create your own photographic paper from egg whites(albumen) and silver nitrate.
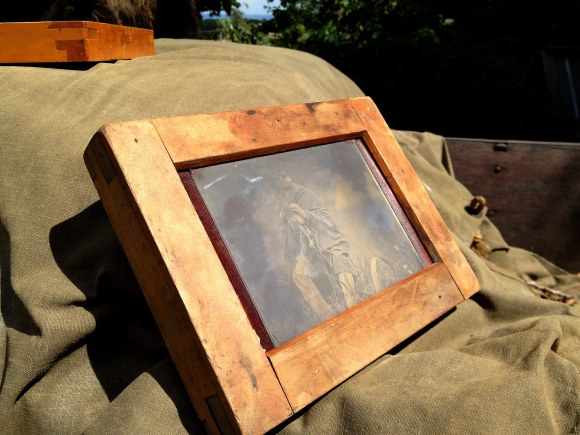

Here’s the “Chicken Whisperer” getting fixed.  I had thought I was shooting vertically, but I had put the plexi holder in horizontally.  Fortunately, I had framed him up in the center and still got a good image…lol.

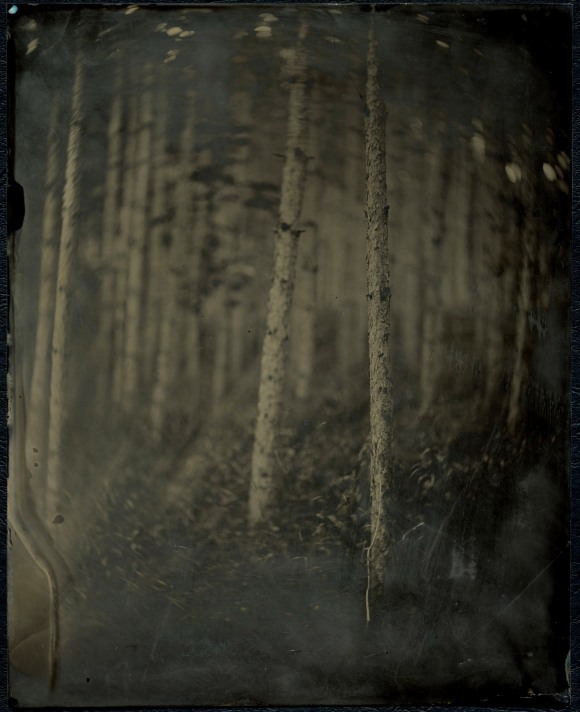
So after lots of instruction, we were off shooting what we wanted to on the farm.  I set up a few shots in the woods.  This is the first time I’m getting to use the camera I bought.  It’s an Anthony Climax Imperial Camera, 8×10 camera.  As I have not gotten a tripod for the camera, I used one of John’s wooden benches to get some lower angle shots.
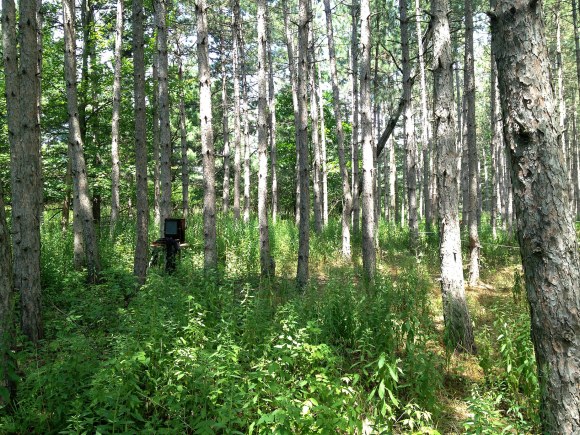
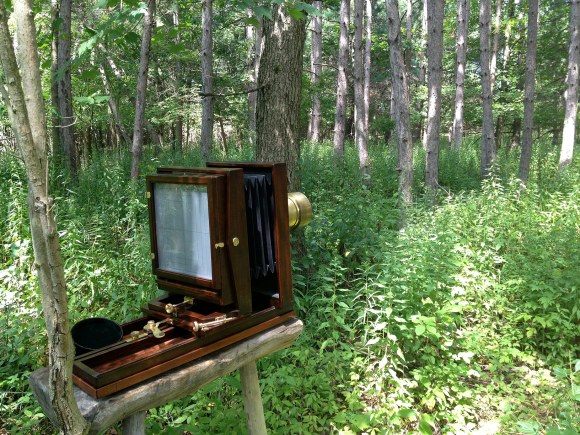
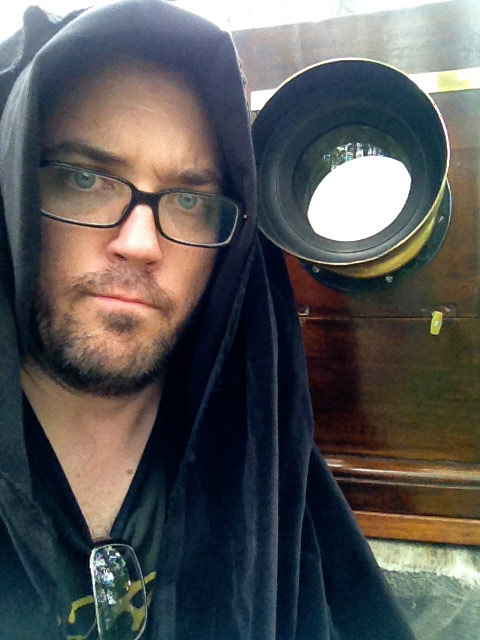
Getting my Luke Skywalker in the swamp moment.
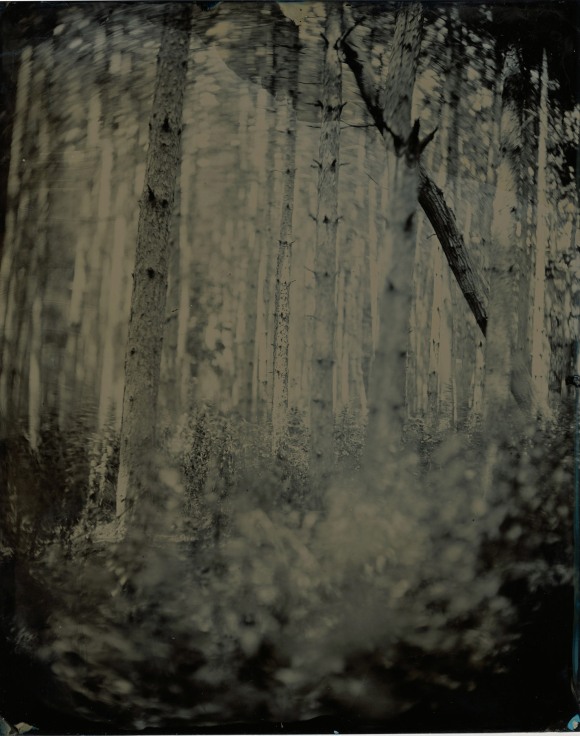
Another little solarization in the bottom right hand corner.   You can see the nice swirly bokeh in the top of the shot.  That comes from the Petzval lens design in the old brass lenses.  This lens is a Voightlander.   I love it as I plan on doing portraits with it and it has a very short depth of field when the bellows is extended.
So John was telling me, when I asked about putting the camera back into the bull’s pasture to be careful as they like to, “investigate” things as a bull had knocked his camera over once before.  Of course, I didn’t listen.  Now, I had to go get the bench, place it, then go back and get the camera.  This  is what I saw when I got back.  They were “investigating” the bench.  It’s a good thing I had not brought the camera out there yet. 😉

My last two plates I shot at the farm were of John and his girlfriend Ann.  I’m very excited by these as I’m looking to do more portraits via glass plate negatives and tintypes.

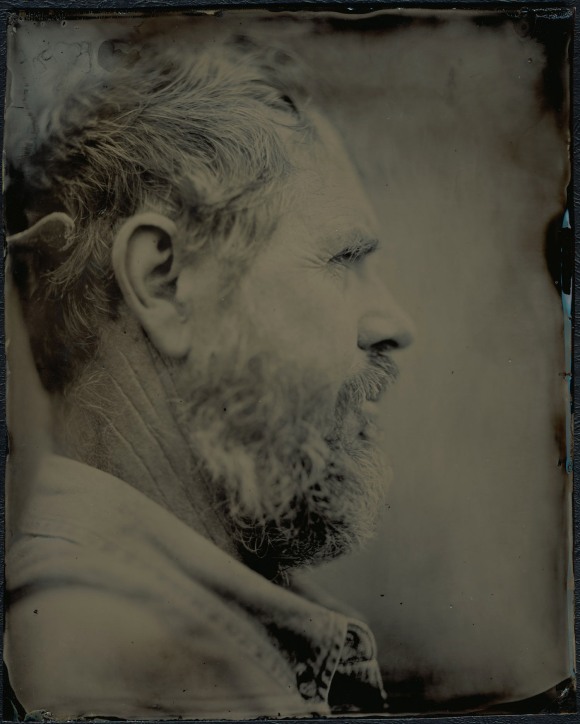
As we were in his house learning to do albumen prints, I saw him from the side and thought a profile photo would be nice.  You can see the head brace in the shot as well.  I think the exposure here was 4 seconds in open shade.
And one of Ann…
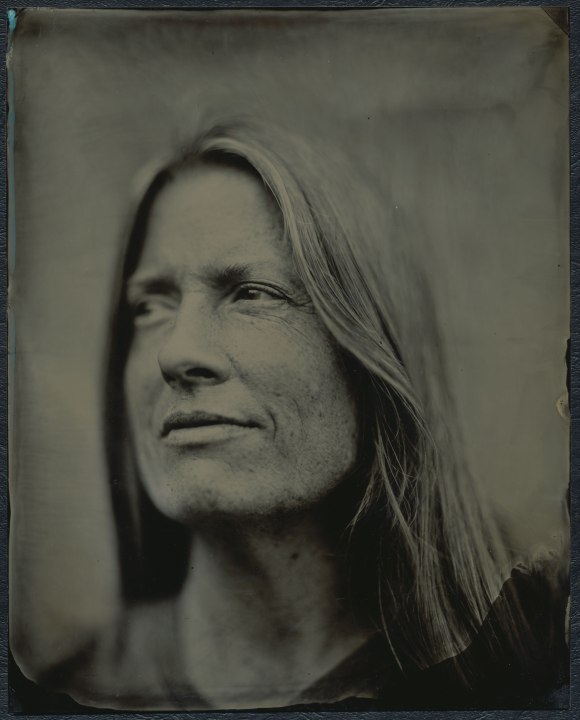
I love both of these.  Ann has such character.  The beauty is in the little details, and also in the  mistakes.  The top left hand corner of John’s did not get processed very well, so when I took it out of the dark box, the sun hit it, then I fixed it, solarizing the corner a little.  The blue line on the right is where the collodion was a little thick and did not quite develop.  So, technically, there are some issues, but that’s also part of the fun.  You never really know how it’s going to turn out until you develop and fix it.

Finally, we get to the Mammoth Plates.  John has a 20×24 camera that we each got to shoot.  It was much more difficult to prepare, shoot and develop.  I was wanting to go big, but I think I’ll be shooting 8×10 for a while.  There’s plenty of time for that later.

This is me pouring collodion onto the mammoth with John’s help.  Not so easy. 😉
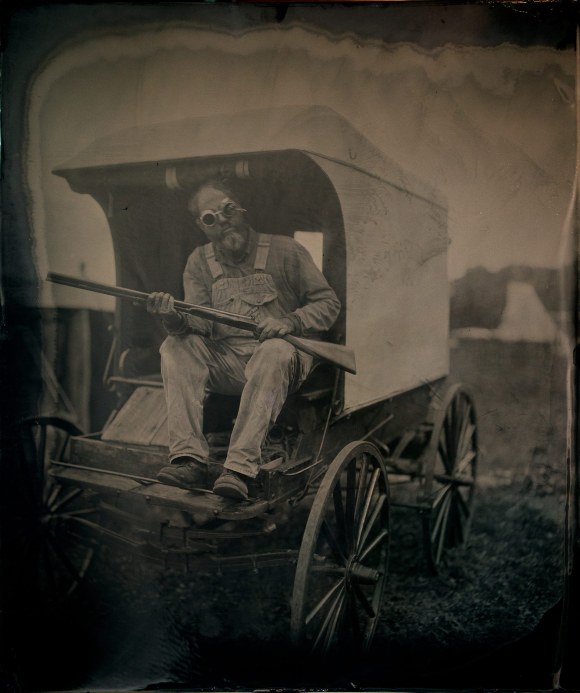
Here’s my 20″ x 24″ Mammoth plate image.  So I was going for a little, “Cowboys and Aliens” here.  John was a good sport to put on the glasses, grab one of his vintage guns, and get into the act. 😉
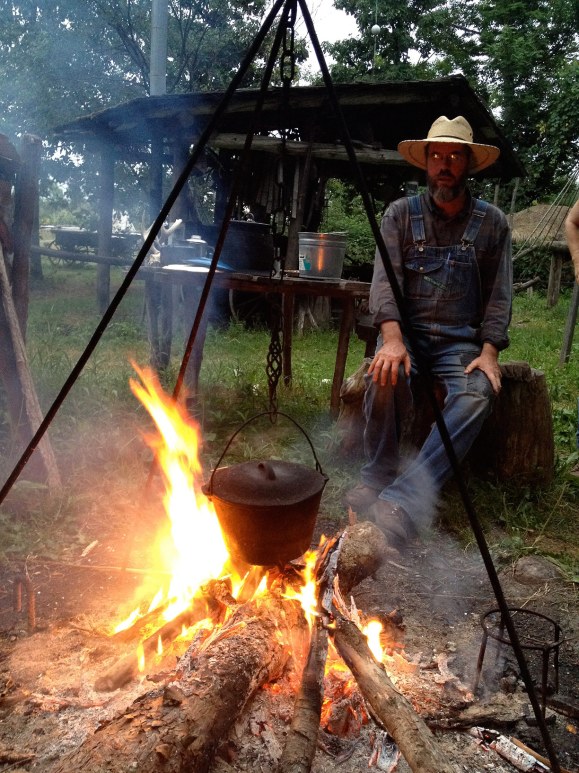
At the end of the day, we all gathered around the fire and cooked up some brats, had a beer, and relaxed.  It’s a lot of work carrying around those cameras, tripod(or bench in my case), setting up the shot, getting the plates poured…going to shoot it…going back to develop it.  Finding out it’s not right, and doing it all over again. Then finally, Fixing it, washing it, drying it, and varnishing it.  It really is great fun and I’m already planning my future shoots.

Thanks for reading.  I hope you enjoyed this look into my first experience shooting Wet Plate Photography.

Now where’s that DSLR of mine…gotta go make some money to pay for all the chemistry and materials now!   😉
Tagged , , , , , , , , , , , , , , , ,

8×10 Camera Portrait Project

Well, I’ve finally decided to get my 8×10 camera project off the ground.  I’ve got a wonderful Horseman 8×10 camera that I’m going to be taking out in the field, and shooting in the studio.  It’s going to be a mixed media project that will include polaroid(made by polaroid), Fuji Instant Film, and of course, 8″x10″ film.  I think most of it will be black and white, but I will also shoot some color.  The objective of the project is going to be getting a wide range of New Yorkers in front of my lens.  Getting out into the field with this camera is not necessarily easy, but it is do-able.
So I thought I should start with my lovely and mostly patient wife, Maria.  She kept saying, “How long does this take”??  lol…Yes, this process takes longer than your usual portrait.  This will be one of the challenges of getting strangers to pose for it on the streets of New York.


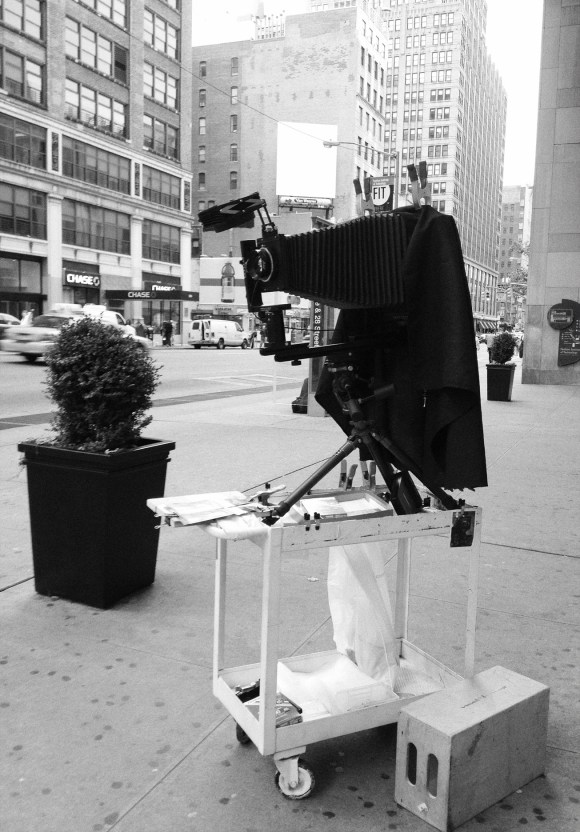
So here’s a photo of the rig I’m using to get the camera around.  Basically, it’s a set cart, a tripod, and the camera.

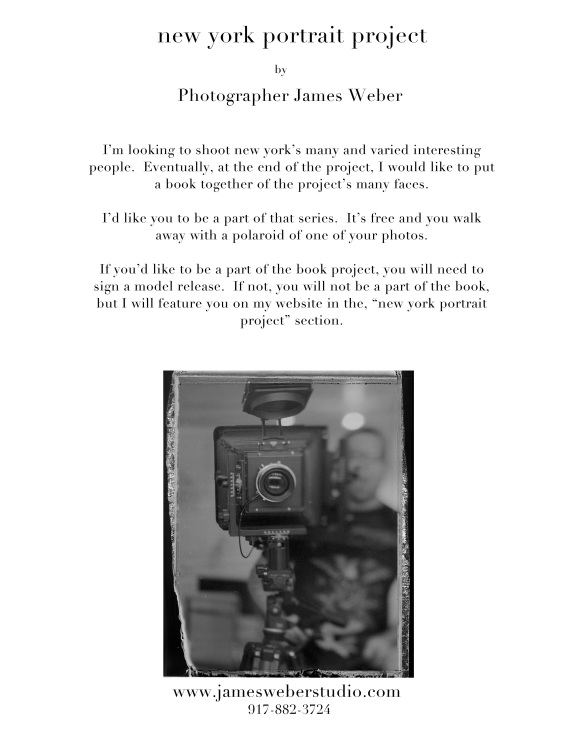
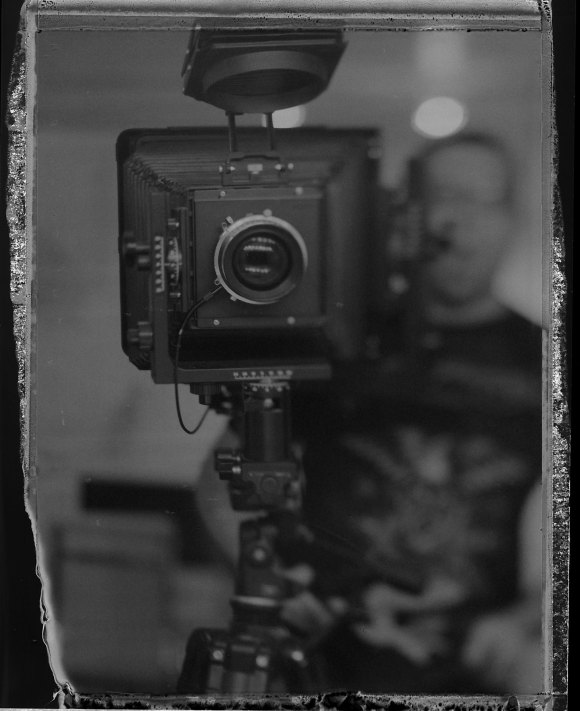
Here’s a shot I took of myself in the studio.

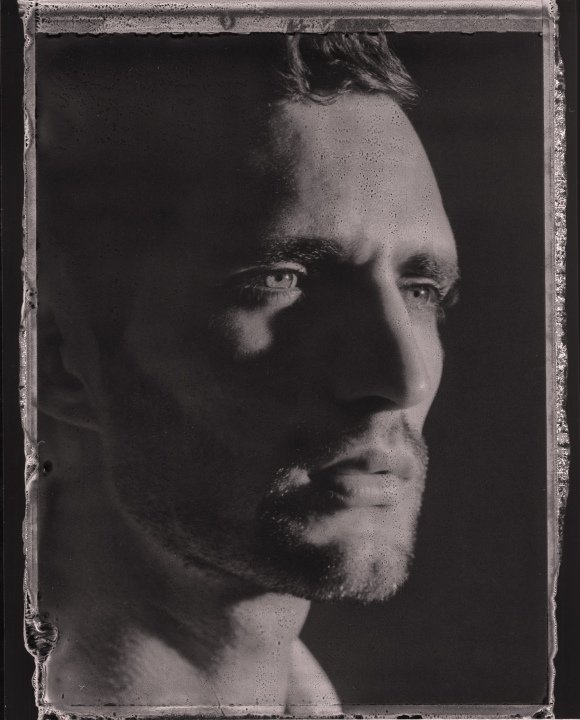
Here’s Tomaz from New York Models.

So the project begins.  I’m really excited to shoot 8×10 film.  I think that part, and the film processing side is going to be a fun exploration.  I’ll post more as it progresses.

Tagged , , , , , , , , , , , ,

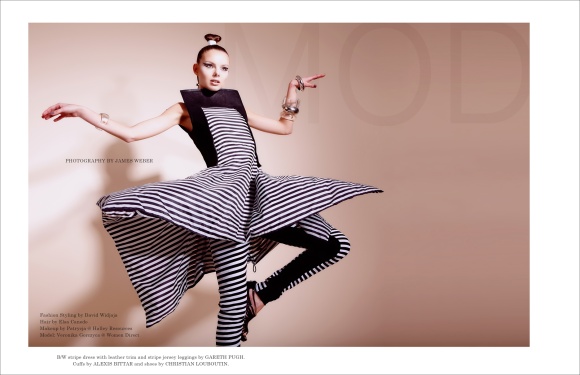
MOD Fashion

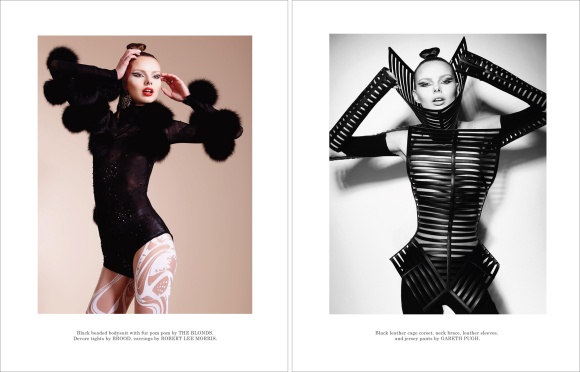
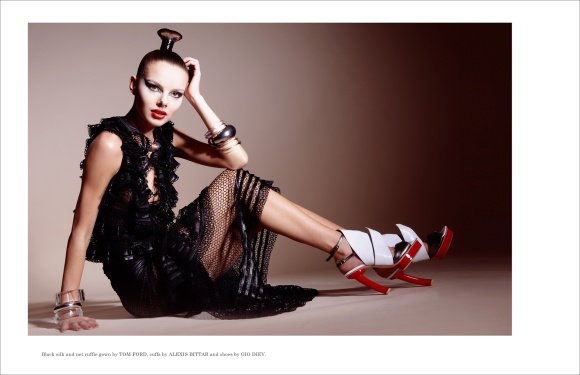
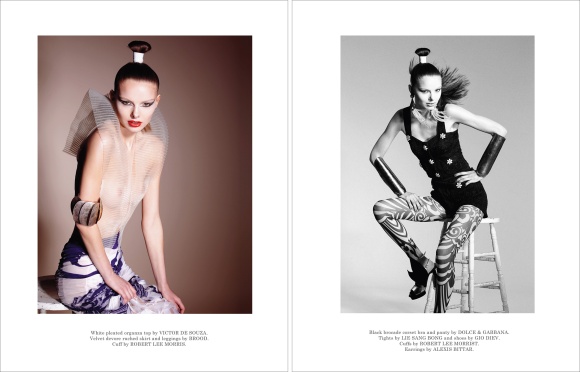
My latest editorial from the fantastic team below. 🙂

Fashion Styling by David Widjaja, introartists.com

Hair by Elsa Canedo, www.elsahair.com
Makeup by Patrycja @ www.halleyresources.com
Model: Veronika Gorczyca @ Women Direct


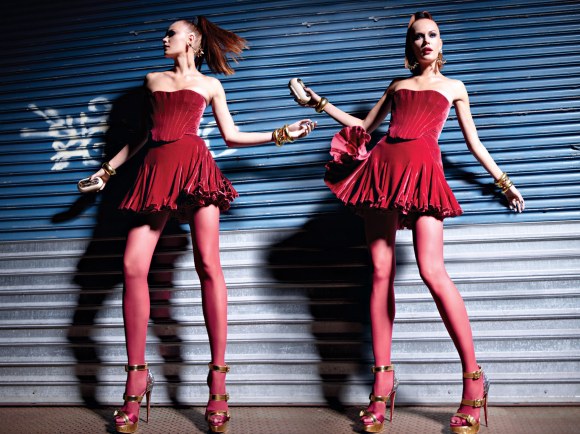
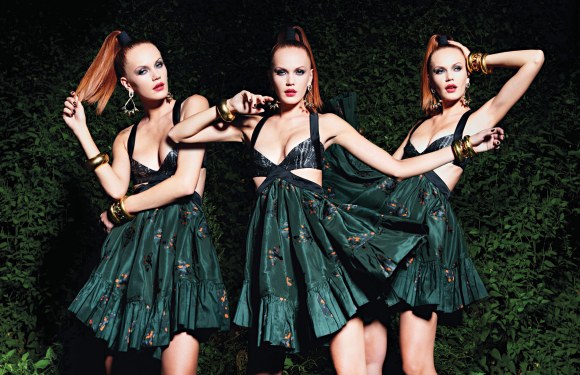
Elsa had a great idea to use electrical tape to wrap the hair up.  We switched it out once from white to black.  It was a simple and beautiful way to showcase the hair.  This is one of the more interesting dresses I’ve ever seen. It’s got a motor inside it that puts air inside the dress…awesome. 🙂


Always love The Blonds and there’s the star of the show…the Gareth Pugh Cage Corset


Love the Tom Ford, and the Red in the shoes with the lip….

I got inspired by the Gareth Pugh cage corset, so I did a little video at the end of the shoot.  Veronika was amazing!

It was a fantastic day all around, thanks to my team. 🙂

More updates to come if I can but find the time to blog about it…lol.  Til next time… James

Tagged , , , , , , , , , , , , ,

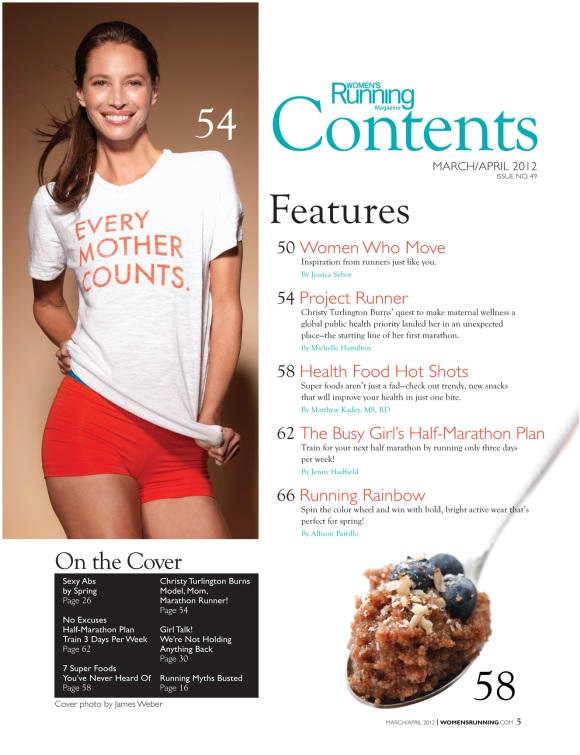
Christy Turlington Cover Shoot!

Ok, so here I am in the Dominican Republic, on my Honeymoon, enjoying this beautiful weather and perfect scenery…

…and then I look down at my phone(I know…I’m on my Honeymoon, I shouldn’t be looking at my emails…lol)…but what would that have gotten me?…Ha!  Anyway, there was an email from  Women’s Running Magazine asking me if I’d, “Like” to shoot Christy Turlington for their March/April 2012 issue.  Ummm…well….you know…Yea!

To shoot one of the original Supermodels of our time, and a personal favorite of mine…. Aaaaamazing!! It turned out to be a really wonderful shoot.  She’s absolutely one of the nicest people I’ve ever shot.  Beyond being physically beautiful, as has been captured for her entire career as a model, she’s also a great human being.

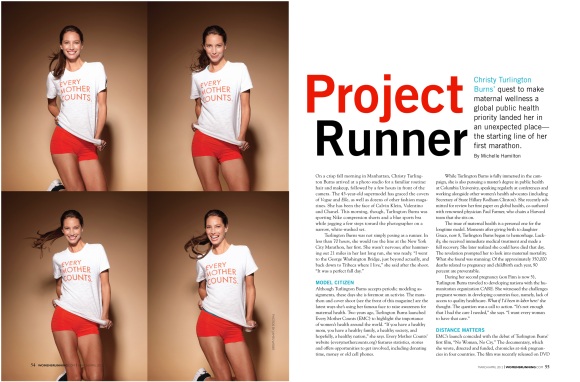
Much of the feature in the magazine covers Christy’s foundation, www.everymothercounts.org.  It seeks to help increase education and support for mothers and their children’s health.  Did you know that a woman dies every 90 seconds from complications of pregnancy?  Neither did I before I met Christy.   You wouldn’t think that in today’s world, this could still be happening. Please check out the foundation link above for more information.  Christy also directed a documentary film, “No Woman, No Cry”, in which she travels to four parts of the world where maternal care is desperately needed.   You can see more about her film here, “No Woman, No Cry” Film.

It was truly an honor to meet and photograph her.

Can you believe she’s a mother of two?  Insanity… 🙂

Here are the results of our shoot…

Here’s a little behind the scenes video of our shoot. 🙂

I must thank my wonderful team for their amazing work here.

Team:
Photography:  James Weber, www.jamesweberstudio.com
Hair Stylist: Giovanni Giuntoli, www.giovannigiuntoli.com
Makeup Artist: Tamah K, www.seemanagement.com
Art Direction:  Melissa Mellert
1st Assistant:  James Sullivan, http://www.1prophoto.com
2nd Assistant/Videographer:  Jesus Baez

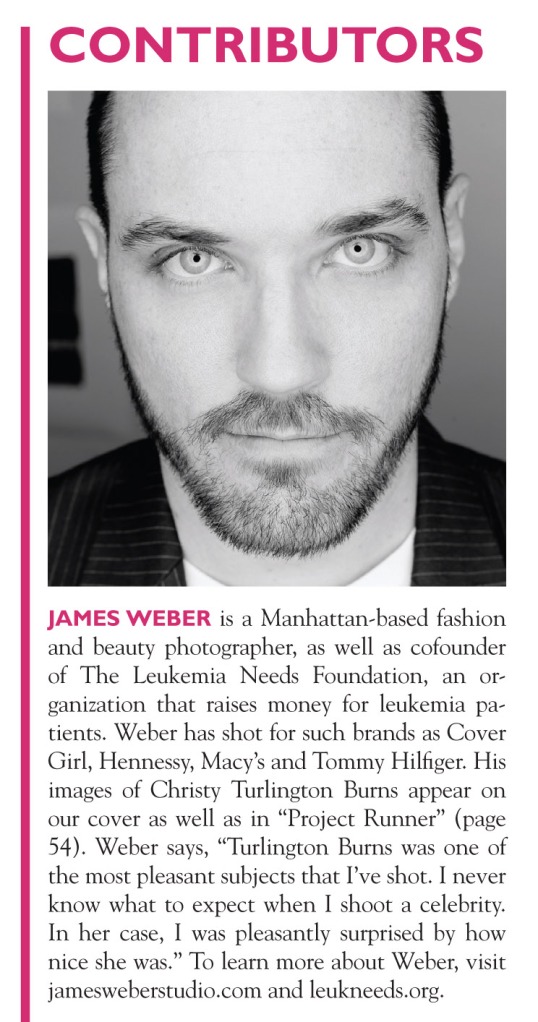
Thanks to David Zimand for the portrait of me in the contributor photo.  It was taken at the May 5th, “Art for the Cause” event for my foundation, The Leukemia Needs Foundation.  www.leukneeds.org

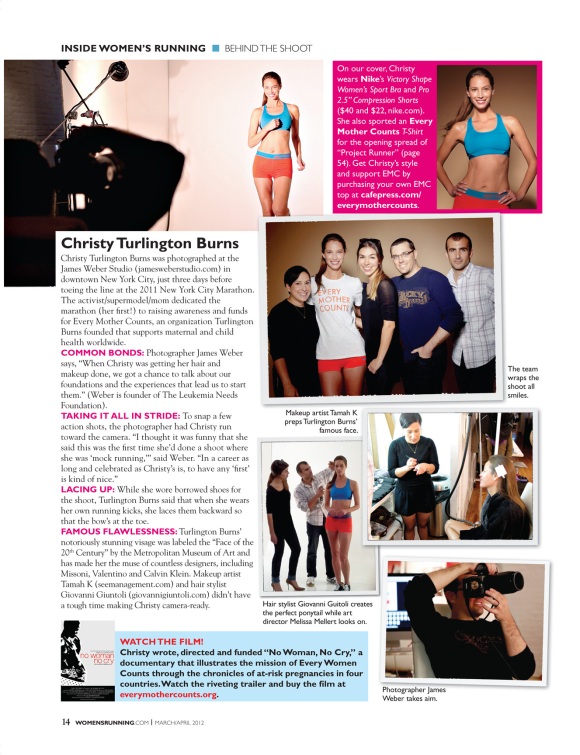
It was nice of the magazine to do a little behind the scenes of the shoot.  We had such a great time shooting it.  It all happened in 2 hours.  Hair/Makeup/Photography, and even a small interview during hair and makeup.   It’s amazing how much you can get done when you have to. 🙂

We had some fun at the end of the shoot with her in her, “Every Mother Counts” t-shirt.  I LOVED her energy!

Thanks so much for checking this out…more to come soon.  I’m working on a little video behind the scenes right now…check back later for that…

Tagged , , , , , , , , , , , , , ,

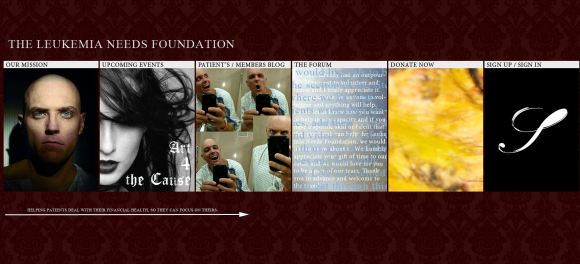
The Leukemia Needs Foundation is LAUNCHED!!

For a few months now, myself and Dr. Patrick Fullerton have been working on getting this foundation ready so we can start making a real difference in the lives of Leukemia patients.  Here’s the web address that you can visit to sign up and view what the foundation is about and events that are planned:  http://www.leukneeds.org

Our first event is going to be an art auction on May 5th.  That day is special to me as it’s the one year anniversary of my successful bone marrow transplant.  We’ll be auctioning off art by some amazing photographers and painters.  Click here for more details:  Art for the Cause

I’m really excited about the prospect that I can start giving back as a cancer survivor. 

Below is our Mission and who we intent to help:
The Leukemia Needs Foundation is a Not-for-Profit Foundation created to financially assist leukemia patients while acutely hospitalized.  The Foundation was created by James Weber and Dr. Patrick Fullerton
During the acute phase of the cancer, many patients are unable to meet their financial obligations due to the inability to work, as it was for founding member, James Weber.  He was hospitalized for 45 days, and out of work for 90 days.  During that time, he had to rely on his family to help with his, “Life Bills”.  His medical coverage was 100%, but that won’t pay rent or any other bill while out of work.

The Leukemia Needs Foundation was created for exactly this purpose, to directly fund the leukemia patient so they can meet these obligations while hospitalized. The foundation was creation to fulfill these important needs by its co-founders, Mr. James Weber and Dr. Patrick Fullerton. The company headquarters are located at 607 Prairie Lake Dr. Casselberry, FL 32730.

Our goal is to raise money so that grants(amount based on need) can be made to leukemia patients that are in need.  It’s very hard to focus on getting healthy when your financial life is crumbling around you.

Right now, we are focusing on Memorial Sloan Kettering as the 1st hospital that we’re putting into our network.  Hopefully, our Fund Raising efforts will pay off and we can expand to more hospitals around the country.

I’m hoping to mobilize as many people as possible for the cause.  I invite all of you to check out the site and sign up.  Feel free to pass this blog post along to your facebook and twitter pages.  I’m looking to get it out there as fast and as wide as possible.  Thanks for listening and I hope to see you as a member of the Leukemia Needs Foundation!!

http://www.leukneeds.org

Thanks,
James

Tagged , , ,

Magna Beer – Water Shoot

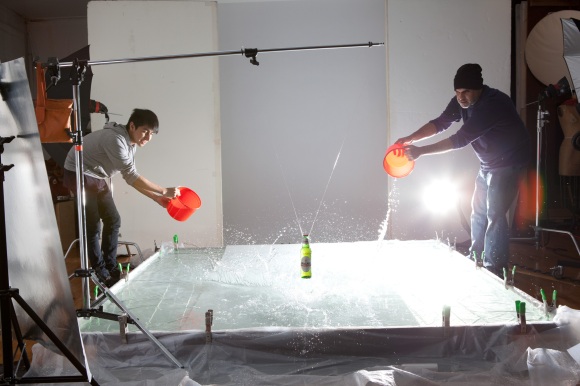
So I don’t think I’ve ever grown up.  I mean, really…still playing in a pool of water only a few inches deep…makes you think back to that little plastic pool you had as a kid.  What can I say, water is fun to shoot…in and around, if a little messy.  I had my two compatriots, Henry Alvarez and Jesus Baez with me to create some great beer advertising imagery.  This is not a project you can do alone.  It requires teamwork.

The idea was simple:

1. Go to Home Depot and buy new Drill!! (been looking for an excuse for that). Love me some Makita.
2. Create big pool enclosure out of 1’x6’s reinforced by 2’x4′ pieces at the corners. Make sure to screw from the inside out or risk the screw going to deep and puncturing a hole in your enclosure…
2. Fill pool with water(and hope it doesn’t leak).  For this, I bought a 10’x25′ 6 mil drop cloth that I doubled, so that, effectively, you get 2-6mil plys for your waterproofing.
3. Set up boom and tie off beer bottle to it via fishing line.
4. Light it and throw water at it and me until the perfect capture is made…

So is this work or play??  Play was definitely in the shooting…work was most CERTAINLY the cleanup…hand bailing out of 400 gallons + of water isn’t good for the back. 🙂

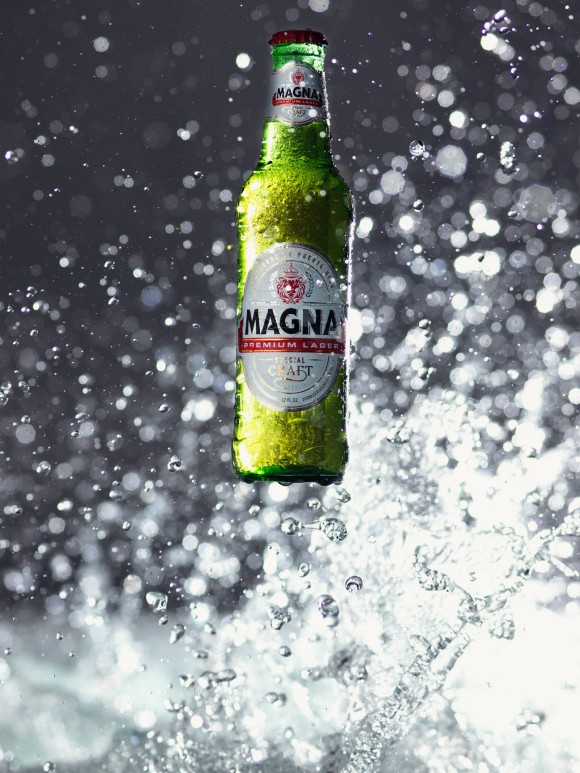
So here’s the money shot.  Click the image to see it bigger…you can see more detail in the larger pic.

The pool was 8′ x 8′, and the bottle was set near the front of the pool.  I believe the f/stop was 4.8, which allowed a nice depth of field behind the bottle for the water droplets to go in and out of focus based on how far from the camera they were.

Here’s a closeup shot.  Strangely enough, all the best shots came when the camera and I got wet as well…gotta take one for the team sometimes. 😉

…and the team that helped create it(below).
Jesus Baez on the left and Henry Alvarez on the right.  I’d like to thank both of them again for their help and hard work, especially on breaking down the set and draining the lake…not fun…

I may post a little video later of us doing the shoot, but I’ve got no time to edit the video now…so we’ll see about that later…til next time…

Thanks for viewing,
James

Tagged , , , , , , , , , ,

Memories of Japan

With all of the tragedy that has befallen Japan recently, I thought I would share some of my experiences during my three wonderful years there. There has been so much devastation, it seems that’s all anyone can talk about.  I’d like to share a little light on what it was like to live there for 3 years…the good things.

I had just finished U.S. Navy boot camp and then sent off to my “A-School” where I would become a Photographer’s Mate(Navy term for photographer).  I was sent to the Defense Photography School in Pensacola, FL, and graduated 2nd in my class.  Myself and the #1 guy got our choice of orders.  Everyone else got sent where they were sent.  Study hard kids…standings matter. 🙂  He chose Yokusuka, Japan, where the Admiral’s Barge was stationed.  I chose the other Japanese billet, Misawa, AB Japan.  I was there from 1994-1997, starting when I was just 20 years old.

I feel fortunate to have had the opportunity to travel and live abroad.  It enriched my life more than I could have expected.  The Japanese culture is a world away from American culture and taught me many life lessons.

Where to start…well, I guess where I have a few photos to share the story…

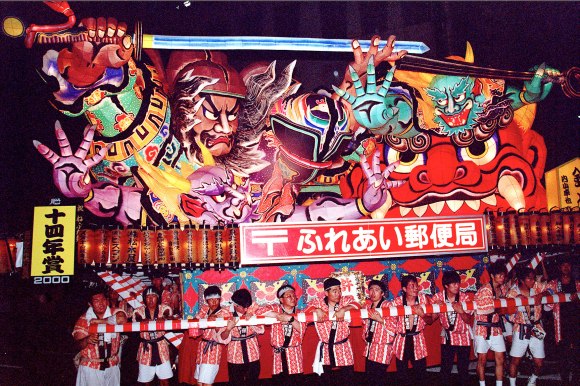
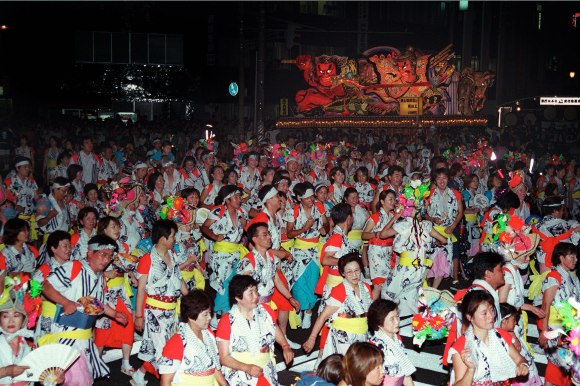
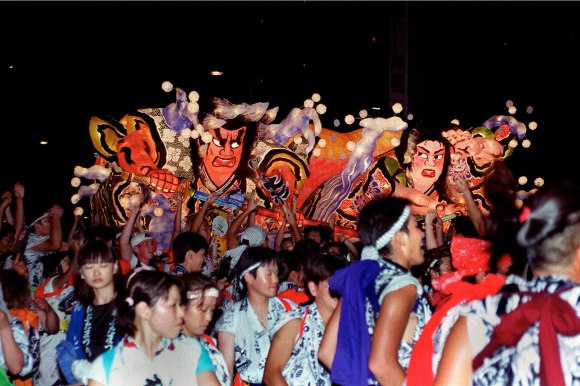
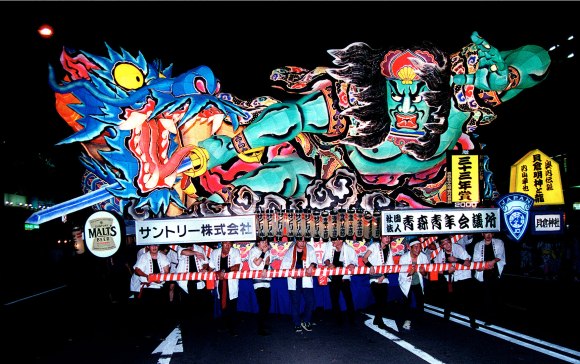
The Japanese have festivals in cities all around Japan, for different events and different times of the year.  One of my favorites was the Nebuta Festival in Aomori-Shi, Aomori Prefecture.

Nebuta was THE festival to go to if you could make it.  It was a few hour drive from Misawa, Japan, where I was stationed.  The drive there was gorgeous, going through mountains and beautiful forests.  Finally, being a part of the celebration was wonderful.  Thousands of people showed up.

I LOVED the drums!  Some of them were as big as a semi-truck and had 4 and 5 people playing them.  They rolled through the streets and the sound was thundering!

Click the link below, “Nebuta Festival Sounds”(opens a new window) and then come back to this window.  It will give you a feel for the sounds of the festival…volume higher is better.

Nebuta Festival Sounds…

If the images look a little grainy…they are.  Every image here is either color, black and white film, or chrome as digital wasn’t even in it’s infancy yet…Click any image to see it bigger.

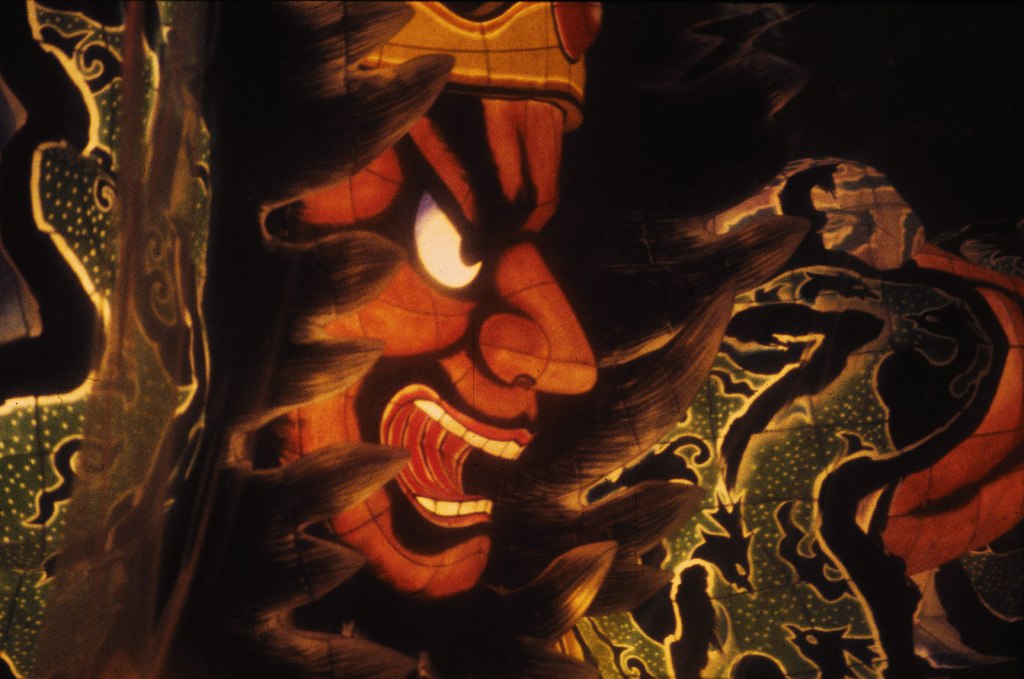
The Nebuta floats are made from historical figures in history…dragons, samurai’s, and other warriors in Japanese Legend.  They’re three dimensional figures built on a frame, then carefully papered, colored, and lit from inside so they’ll stand out in the dark night. How they are made

I got up higher to take this shot of the crowd and the Nebuta figure coming around the corner.

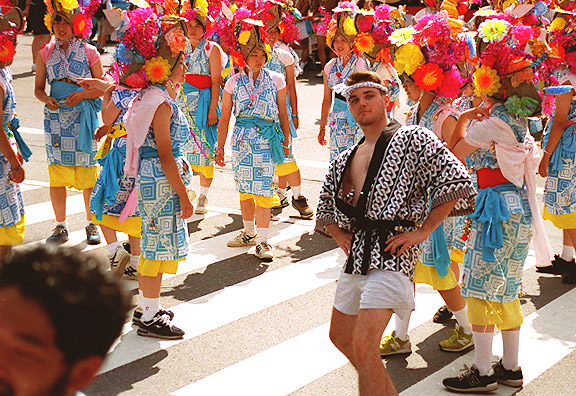
Here’s me taking part in the festivities…that bulge in my pocket…12 rolls of film…stop it you dirty minded blog readers!  lol….

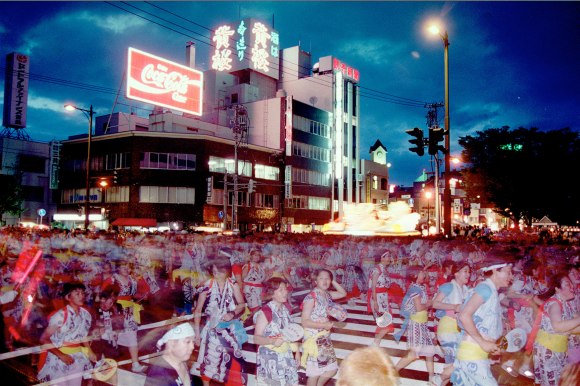
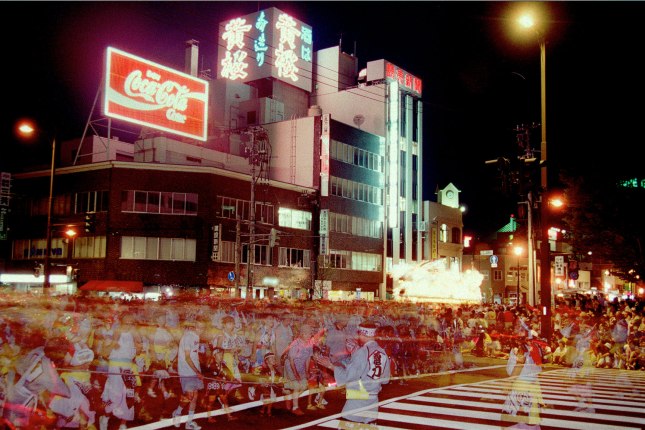
These two images(above and below) are one of my first attempts at rear-curtain sync…


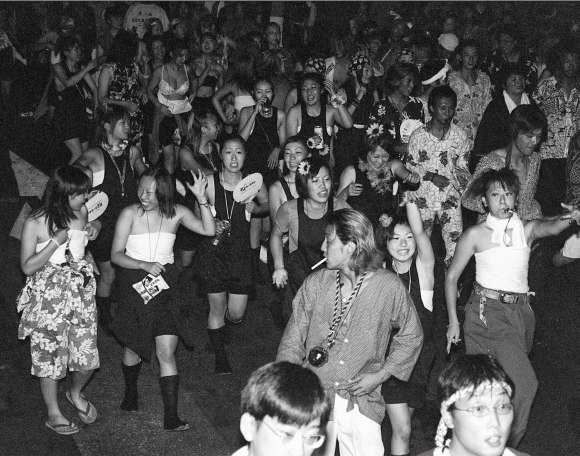
This is the, “young” crowd who bucked tradition by not wearing the usual festival outfits…even one girl in just a bra top left…little rebels…all of them. 🙂

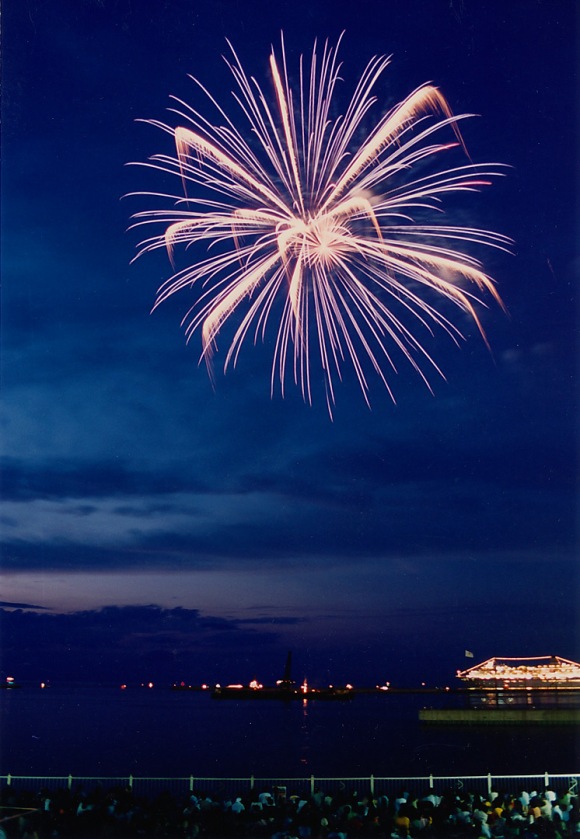
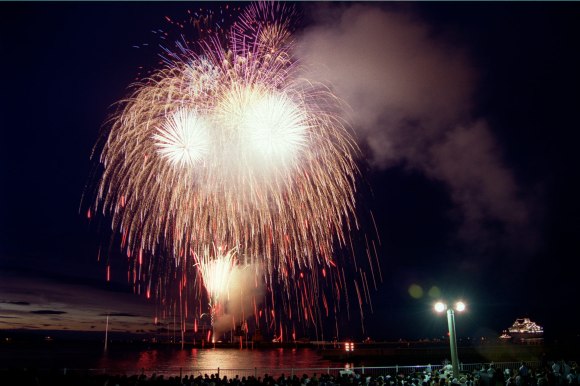
At the end of the night, all of the floats would be put out on the water and a wonderful fireworks show ensued…


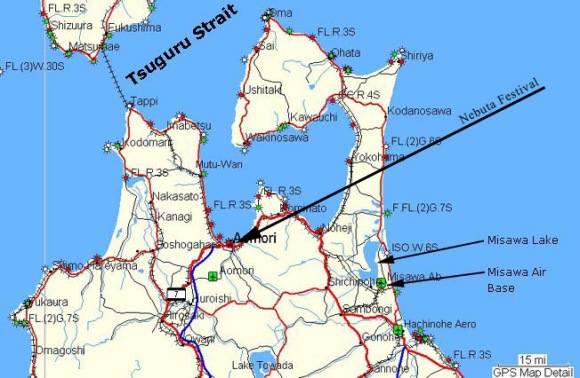
Here’s a map that shows where I was stationed in relation to Aomori City where the Festival was held.
Northern Japan in general was my playground.   Every weekend that I could, I got out and tried to see something new…

The natural beauty of Japan and her surroundings I never tired of.  My friends and I would just get in the car and drive.  Sometimes we had no destination in mind, just to get off base and get lost in the country.  We’d have a general map, but we preferred to take the roads where we did not know where they lead.

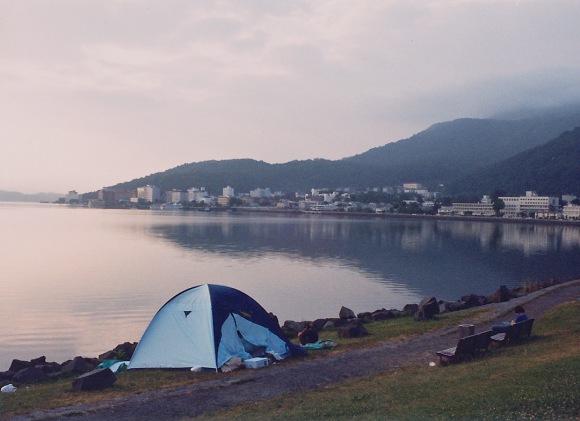
The cool thing about camping in Japan, is you could really camp anywhere.  No one cared as long as you picked up after yourself.  We’d take road trips and just pull over somewhere, set up the gear, and start cooking…

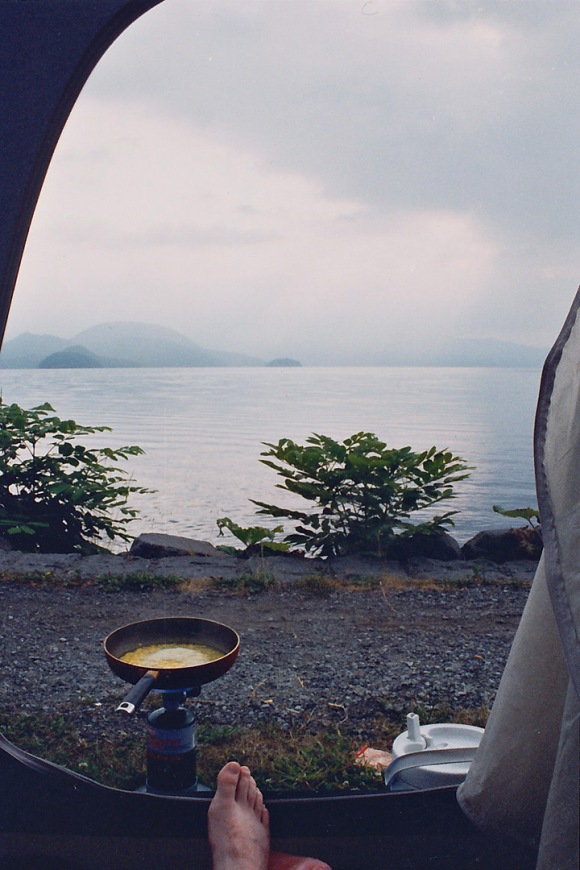
Pardon my feet here…just to give realness…lol. cooking breakfast in my Coleman gas grill.  Nothing like opening up your tent in the morning to a view like this…

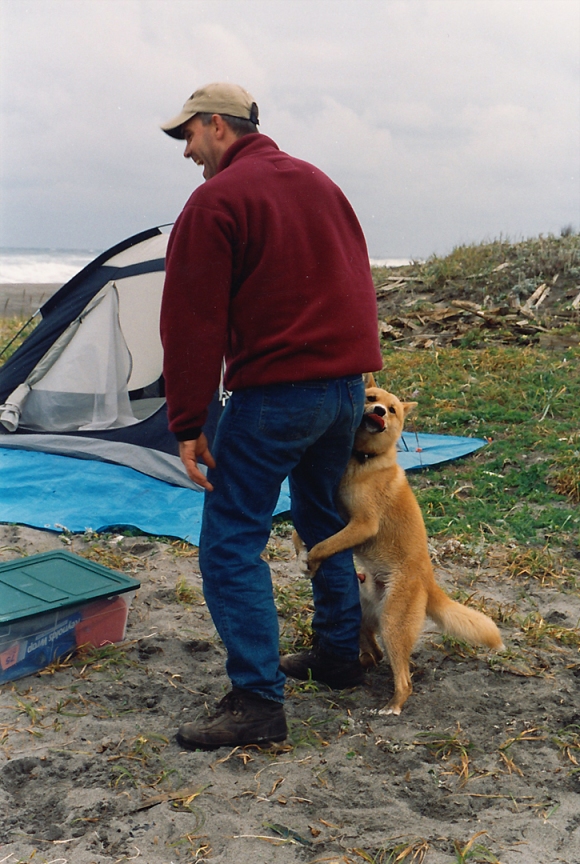
This is my good friend(and boss at the time, PH1(SW/AW) Jim Schulz..getting his leg humped by a stray dog…too funny. This was one of our favorite camping spots on the beach on the east coast of Japan.

Ok, I’ll break down the military jargon for you…  the PH means, “Photographer’s Mate”, the “1” means 1st Class(or E-6 on a scale from 1 to 9).  The SW means he was Surface Warfare Qualified and the AW means he was Air Warfare Qualified.  What this means, in general, is that Jim was one bad ass Photographer, boss, teacher, and friend.  He taught me a lot of what I know today about photography.  Yes, he was at times a hard ass, but he must have done something right as I’m doing it full time today and enjoying every minute of it.  Thanks, Jim!  Jim retired as PHC(SW/AW) Jim Schulz (Chief Petty Officer).  A damn fine example of what is right about our military.

We liked to take some of those Coleman propane tanks(seen above in my cooking shot) when the fire was hot, shove it in…give it a few minutes and it would explode about 50 feet into the air…juvenile…yes.  Fun and satisfying…Oh, yea…lol.  Just don’t try it with canned air…almost took out the car’s windshield…very unpredictable…

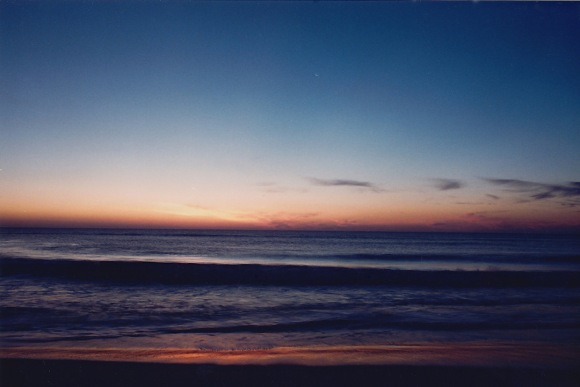
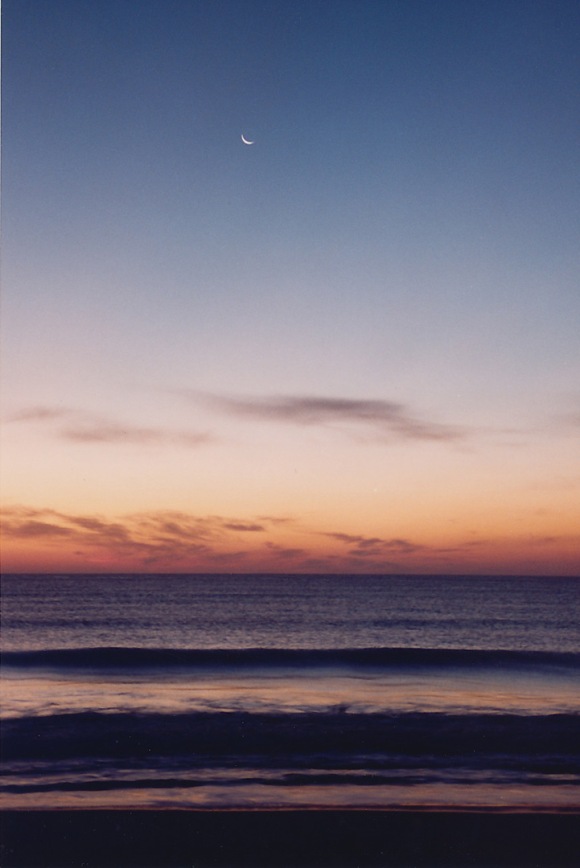
The nights on the beach were gorgeous…

Continuing on…

Sorry about the length of this one…you need to go get a drink?  Take a piss?  Go ahead…I’ll still be here.. 😉

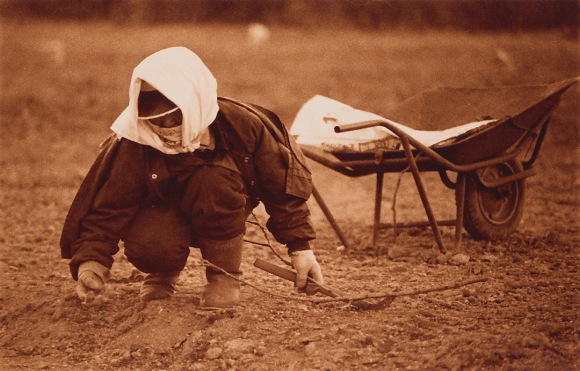
These are some random photos I took while traveling around Japan.  I’ll have to do another few posts to show the whole breadth of imagery I took…but that takes a scanner and time.  Everything I shot was on film or chrome and thus has to be transferred to digital eventually.  It’s a long term project of mine…


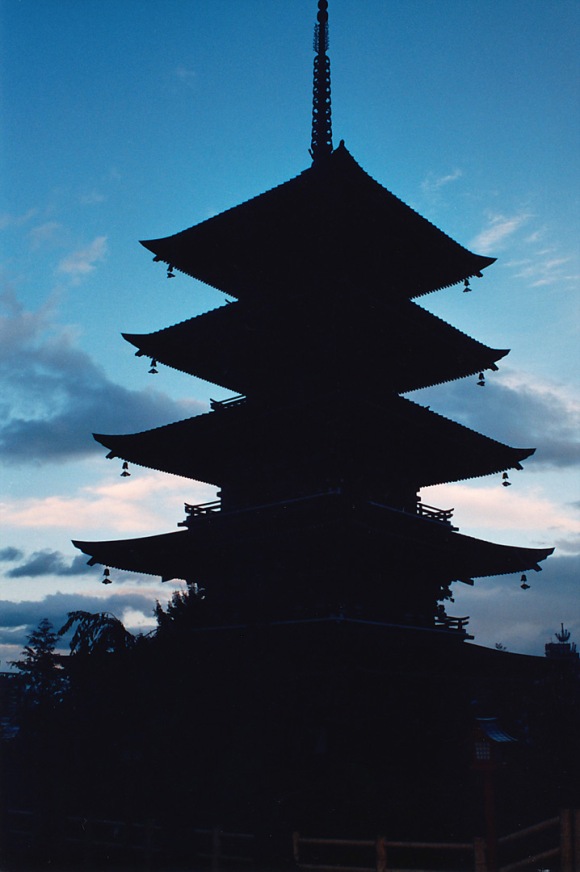
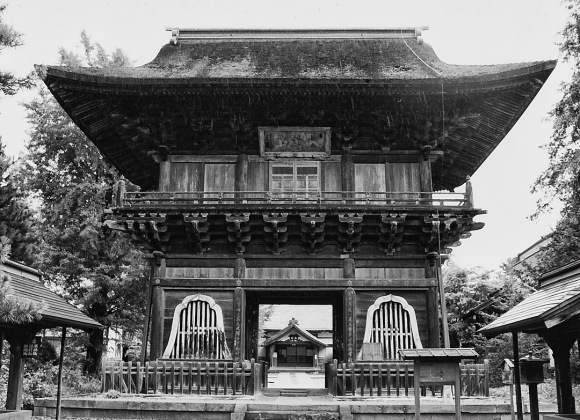
I loved the old temples.  They had such character, the likes of which isn’t created again in today’s world.

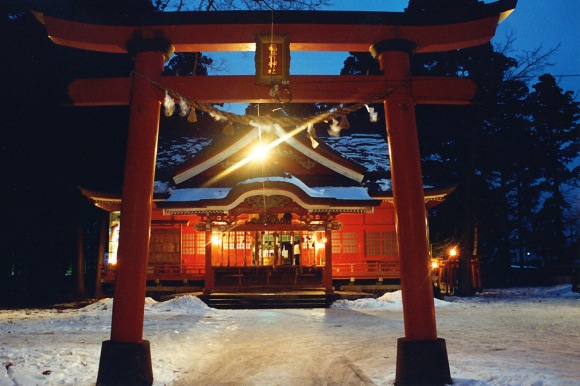
One of my favorite Temples is on the way to Lake Towada.

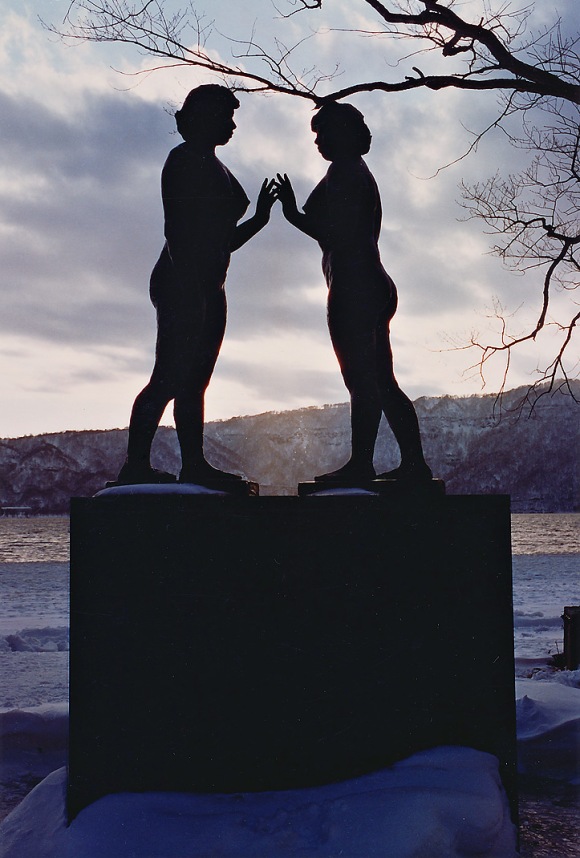
A winter in Towada.

There’s much more to the story, but that will have to wait until I get the negatives scanned in.  I shot thousands of images in Japan and it’s just a little daunting to look at it and want to get it transferred to a digital format now…

I hope this has been a little enlightening as to a tiny slice of life in Japan from one person’s view.

I grieve for all of the Japanese people affected by this Tsunami and resulting Nuclear Plant tragedy.  As someone who got to enjoy spending time with the people and the beautiful Japanese environment, I pray that they have the strength to put things back together again…

If I can, I’ll scan some more images and share some more of my experiences in Japan.

If you’d like to donate to the Red Cross’s Japan effort, you can do so here:  Red Cross Japan

Thanks for listening…James

Tagged , , , , , , , , , , , ,

Fashion Night Out

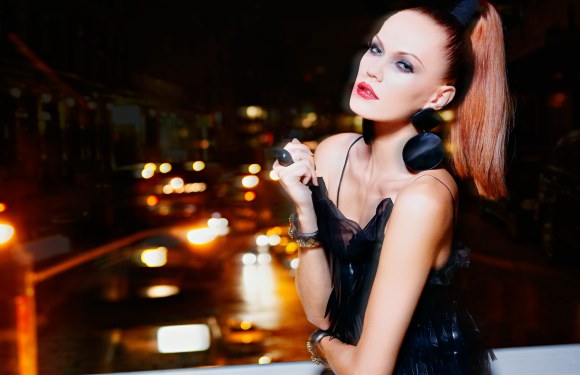
Ok, another post that’s taken me a while to get around to…four months or so, but who’s counting. 😉  Had a great shoot in and around the High Line and the Meat Packing District.  It’s one of the few areas in New York that still have the old cobblestone streets.  Only a few years ago, meat packing was a rough place and stank to high hell with all of the meat packing plants there.  Now, most of the plants are closed, and the district has become the next big shopping mecca, but it still has the look that I wanted…

So we started hair and makeup around 4pm at my studio…thinking we’d leave for the 1st look around 6:30pm.  Well, I think we got in the location van about 7:30…a little behind as I wanted to get more of the twilight, but you roll with the changes.  We got everyone in the location van and took off.  We started off on the High Line, which was surprisingly fine with a crew of people setting up shop and shooting.  I was concerned that the people working for the High Line would take issue with people shooting there.  As I thought, however, it goes back to the principle of, “If you aren’t preventing people from moving through an area and your crew is fluid and can move where it needs to, you’re ok”.  The rules of, can you shoot in New York with or without a permit, only really apply if you want to stop traffic or block a street from pedestrians from coming through your set.  If you’re fluid, you’re generally good.

We shot this while we had a guard coming over to us and saying, nicely, “10 minutes to closing”…which was nice of them.  They didn’t have any issue with us shooting there, they just wanted us out on time.

So we headed out on the street, I believe this is Gansevoort St…with the Gansevoort Hotel in the background.  I’m a huge fan of mixing strobe and ambient light, be it outside in full daylight or, as in this shot, using the city lights at night as the ambient.  Time exposure, around 1-2 seconds + Beauty dish strobe.

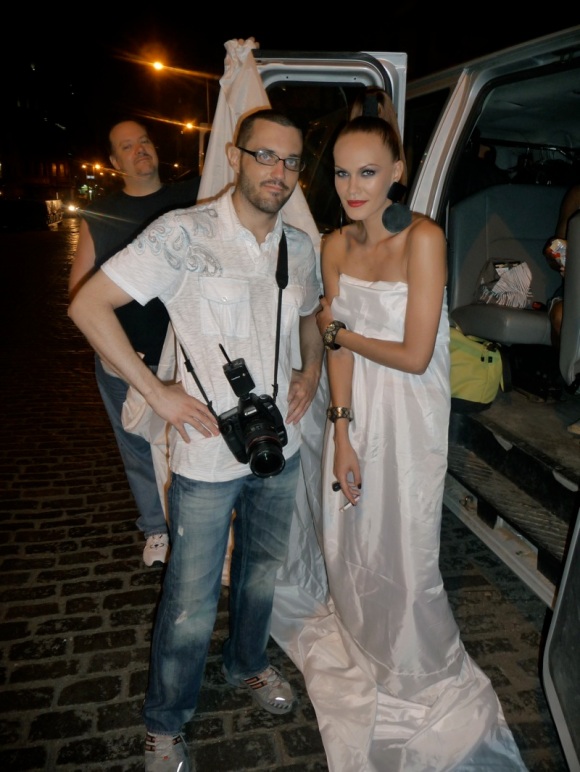
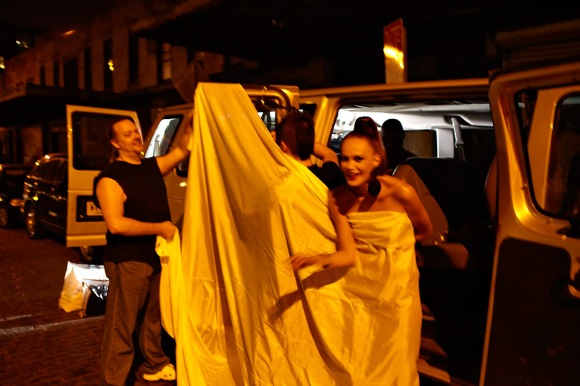
Here we are taking a break at our location van/changing station…
Onto the next shot…

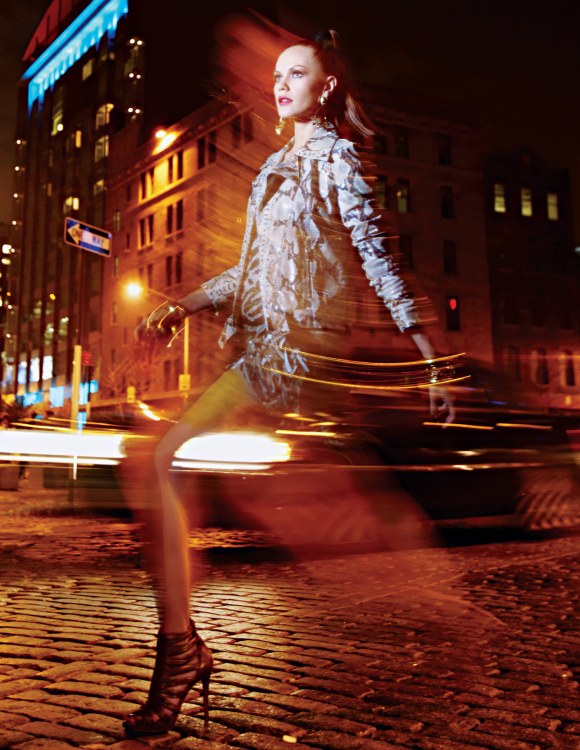
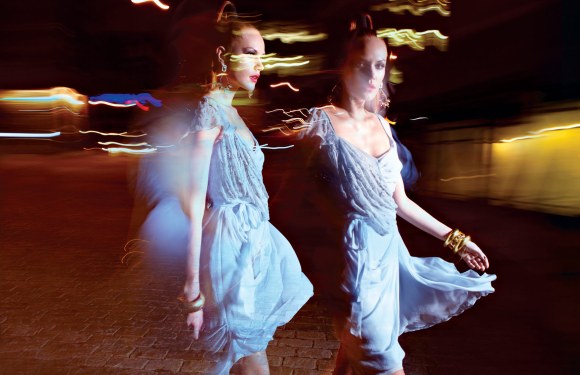
This one was difficult.  I was walking back with the model, still at about 1 sec exposure, and had my assistant James walking back as well with the strobe, trying to keep the distance the same so the exposure is good.  We did this eight or nine times and I ended up liking two images.  So this is two of the individual images put together in post.  Other than that, there’s not much done to them.  All of the blurring and colors were done in camera.

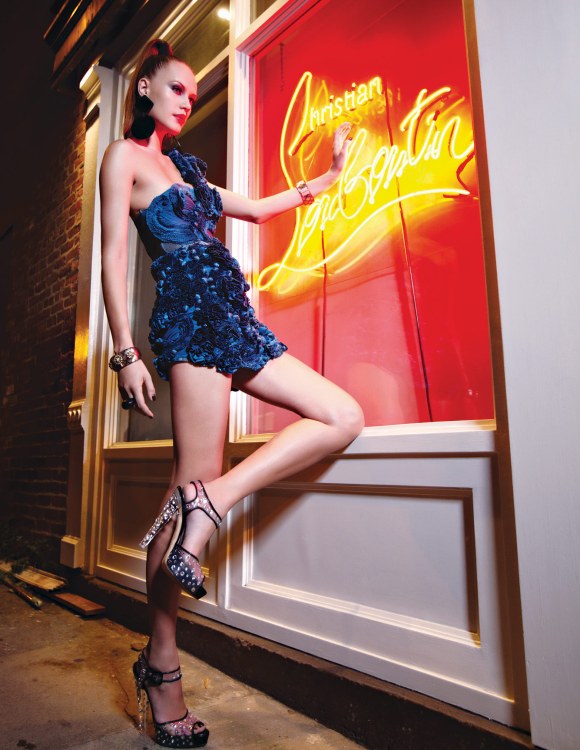
Loved the storefront from Christian Louboutin and the colors it gave off on the model.

I liked the way the red dress and stockings were set off from the blue/silver background.  Also another image put together in post from two single vertical shots.  This wasn’t an easy thing to do.  La Boutique Creative Retouching did a great job making it look seamless.

Now onto our last and most traumatic look.   It was 2am and we were all tired.  Maria’s ponytail was so tight it was becoming painful.  We were all happy that David and Moani had packed up the car and moved it down the street to the end of 27th and the west side highway.  We were ready to go once the look was done.  They then came to join us while we finished up the last look.  The look itself was easy and done in 20 minutes.

We were maybe a 5 minute walk from the location van.   We finished up and started walking back.  We got back to where we had parked the location van….

and it was gone…

So there we were, staring at each other…mildly freaking out.  We were only gone 15 minutes, which means someone was watching and waiting for us to leave.  The only question is…stolen, or towed??  I looked at a sign on the wall and it looks like we were in a tow-zone at night.  Moani, the clear headed thinker that she is, knew about the Tow Yard around 30th and the West Side Highway.  We took off in a cab to the tow yard…

So while I’m in line checking to see if the tow yard had it, Moani took a little video to capture the moment…did they have it or was it stolen???

So, yes, they had it and it took another hour and a half, plus tickets and fees to get our lives back…clothes, camera equipment, etc…which was about 3:30am.  It ended well, but not without a dramatic flair. 🙂  Thanks again to my wonderful crew who put up with a late start and even LATER finish…

THE Crew:

Photography by James Weber, www.jamesweberstudio.com
Styled by David Widjaja, www.introartists.com
Makeup by Moani Lee, www.moanilee.com
Hair by Nelson Vercher, www.utopianyc.com
Model:  Maria Beljanina, www.majormodel.com
Photographic Assistance:  James Sullivan, www.1prophoto.com
Retouching:  La Boutique Creative Retouching, www.laboutiqueny.com


Tagged , , , , , , , , , ,

The Kanji Cosmetics Project – Skin’s Signs

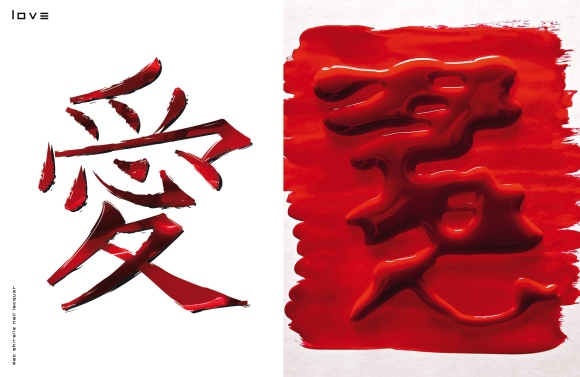
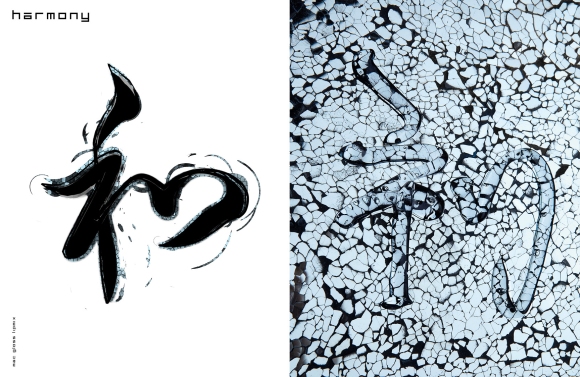
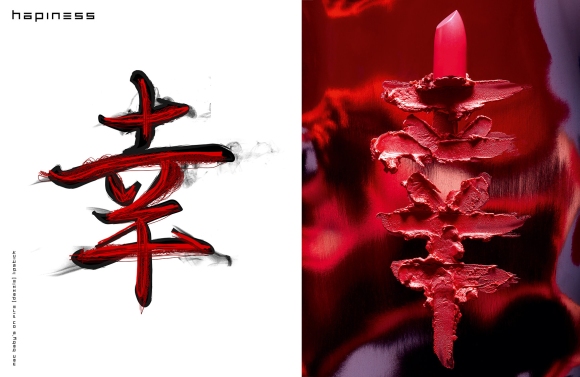
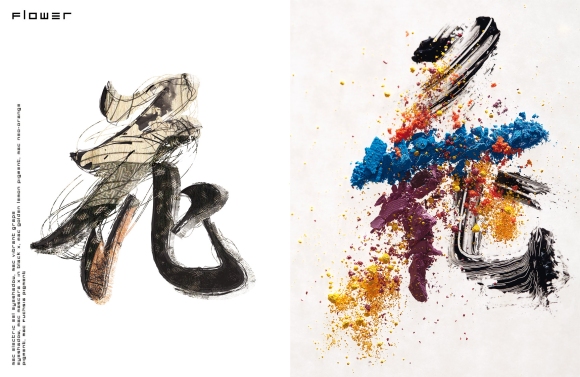
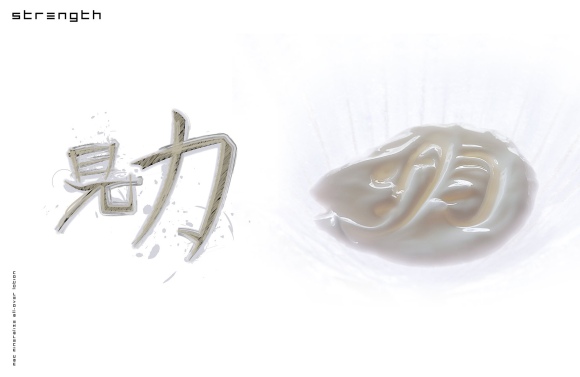
Late last year, I had a wonderful collaboration with two amazing artists on a very interesting, conceptual still life project.  We started the project with seven kanji signs: Love, Life, Harmony, Dream, Happiness, Flower, and Strength.  The idea was to create these signs using cosmetics in an interesting, visual way.  The thing I liked most about this project was the complete creative freedom that was given to us by Hea7en Magazine, where it was run.

I almost didn’t take this on as the actual doing, writing, creating of the kanji symbols in cosmetics to me was very daunting.  In comes my savior, Moani Lee.  Aside from being an amazing makeup artist, Moani also brought to the table the ability to write/create the kanji symbols.  As this is a beauty cosmetics story, I would need someone that really knew the cosmetics and how they interacted with each other.  A story board might also be nice…Problem solved.  Moani came through on all fronts.  She story boarded the project, which was genius….and we got started.

Moani and I got together and went shopping for the accessories that we needed down the street in the Flower District of New York.  I love having that street so near to me as it provides so many great props for shooting different genres.  So we walked out of the store with about $50 in props, that on another day, wouldn’t have caught your gaze, but I knew they would be perfect for our shoot.  So while Moani worked on creating the cosmetic art for me to shoot, I worked on lighting the scene so that each one would have it’s own look and feel.

The last piece of the puzzle was the graphic design work.  We wanted something on the opposite page that reflected what the kanji symbol looked like, but we didn’t know where to go or how to do it.  Enter, David H…

David is an incredible graphic artist.  He took to the project head on and created seven beautiful kanji masterpieces for us to use opposite the photography.

MAC Shirelle Nail Laquer

It’s a tough call, but I think “Love” was my favorite.  It just pops off the page visually.  This isn’t a digital creation.  Moani created the base symbol out of glue, let it dry, then “wrote” on top of it with the nail laquer so that it would be raised higher.  The higher it was, the better for me to light it and get the three dimensional look I was going for.

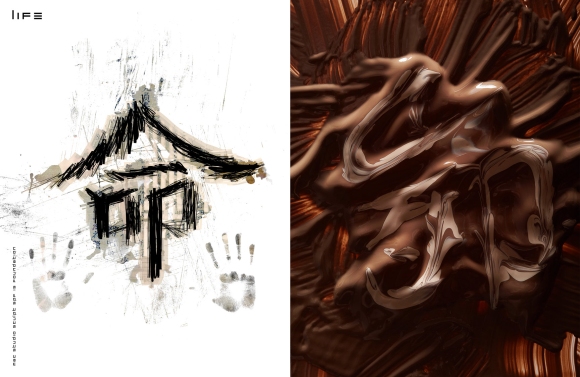
MAC Studio Sculpt SPF 15 Foundation.

Here’s, “Life”, aka “Sexual Chocolate”.  If this wasn’t foundation, I’d think it was pudding that I should dive into and love. 🙂

Mac Gloss Lipmix

I Ioved,  “Harmony”, but it was a hell of a lighting challenge.  How do you light something that’s clear and put directly on a mirror?  Very carefully…I probably took the most time shooting this one as it wasn’t an easy light.  In the end, though, I loved the outcome.

MAC Iridescent Powder  / Loose in Golden Bronze mixed with MAC Matte (Creme Matifiante)

MAC Baby’s on Fire (Dazzle) Lipstick.

Photographically, this is the one that I had the most fun with.  The base that it’s sitting on is this silver dish shaped like a leaf.  Obviously it reflected everything, so I thought to put a red gel over the top of me so that it would warm up the entire photo.  You can actually still see my hand near the top left third of the photo.  Distorted, yes, but still there..

MAC Electric Eel Eyeshadow / MAC Vibrant Grape Eyeshadow / MAC Mascara in Black / MAC Golden Lemon Pigment / MAC Neo Orange Pigment / MAC Fuchsia Pigment.

Flower was a real challenge for Moani as it had to be built upon and you can’t really clean it up if you make a mistake.  She did a wonderful job adding in all of the different colors and making this symbol.
MAC Mineralize All-Over Lotion

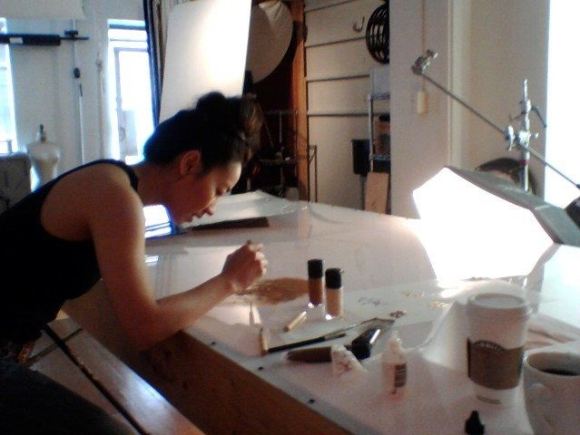
Here’s Moani working on “Life”, or as we nicknamed it, “Sexual Chocolate”. 🙂

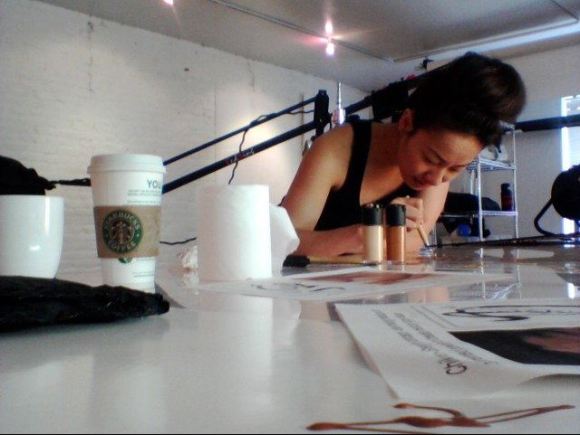
Me downloading the images manually as the tether decided not to work that day…I dunno, would you trust this guy?   😉

On the right, in the foreground you can see a little bit of, “dream” and a nice closeup of the coffee that fueled us…

It turned out to be a fun, creative day.  I’d love to give props to my two partners in crime here, Moani Lee and David H for making this a wonderful story.

Special thanks to Joe Lombardo for bringing this story to Moani and I to shoot.  He was the catalyst that brought all of us together and got the creative spark going.  He’s also the photographer for the wonderful behind the scenes images you see here.

THE Team:
Photography: James Weber
Makeup/Styling/Story Boarding:  Moani Lee, www.moanilee.com
Graphic Artistry/Layout/Design: David H,

Retouching:  La Boutique Creative Retouching, http://www.laboutiqueny.com These guys did an amazing job,  I’d highly recommend them.  They’re a very professional organization.

Hea7en Magazine Issue 4
:  There are many other wonderful artists here in this issue.  I was kind a blown away when I first saw it.  It’s art and photography rolled into one..

Thanks and see you again next time…

Tagged , , , , , , , , ,